OpenHarmony应用随机诗词实践
精华运行环境
DAYU200:5.0.0.66
SDK:5.0.0.66
IDE:5.0.3.800
一、创建应用
1.点击File->new File->Create Progect
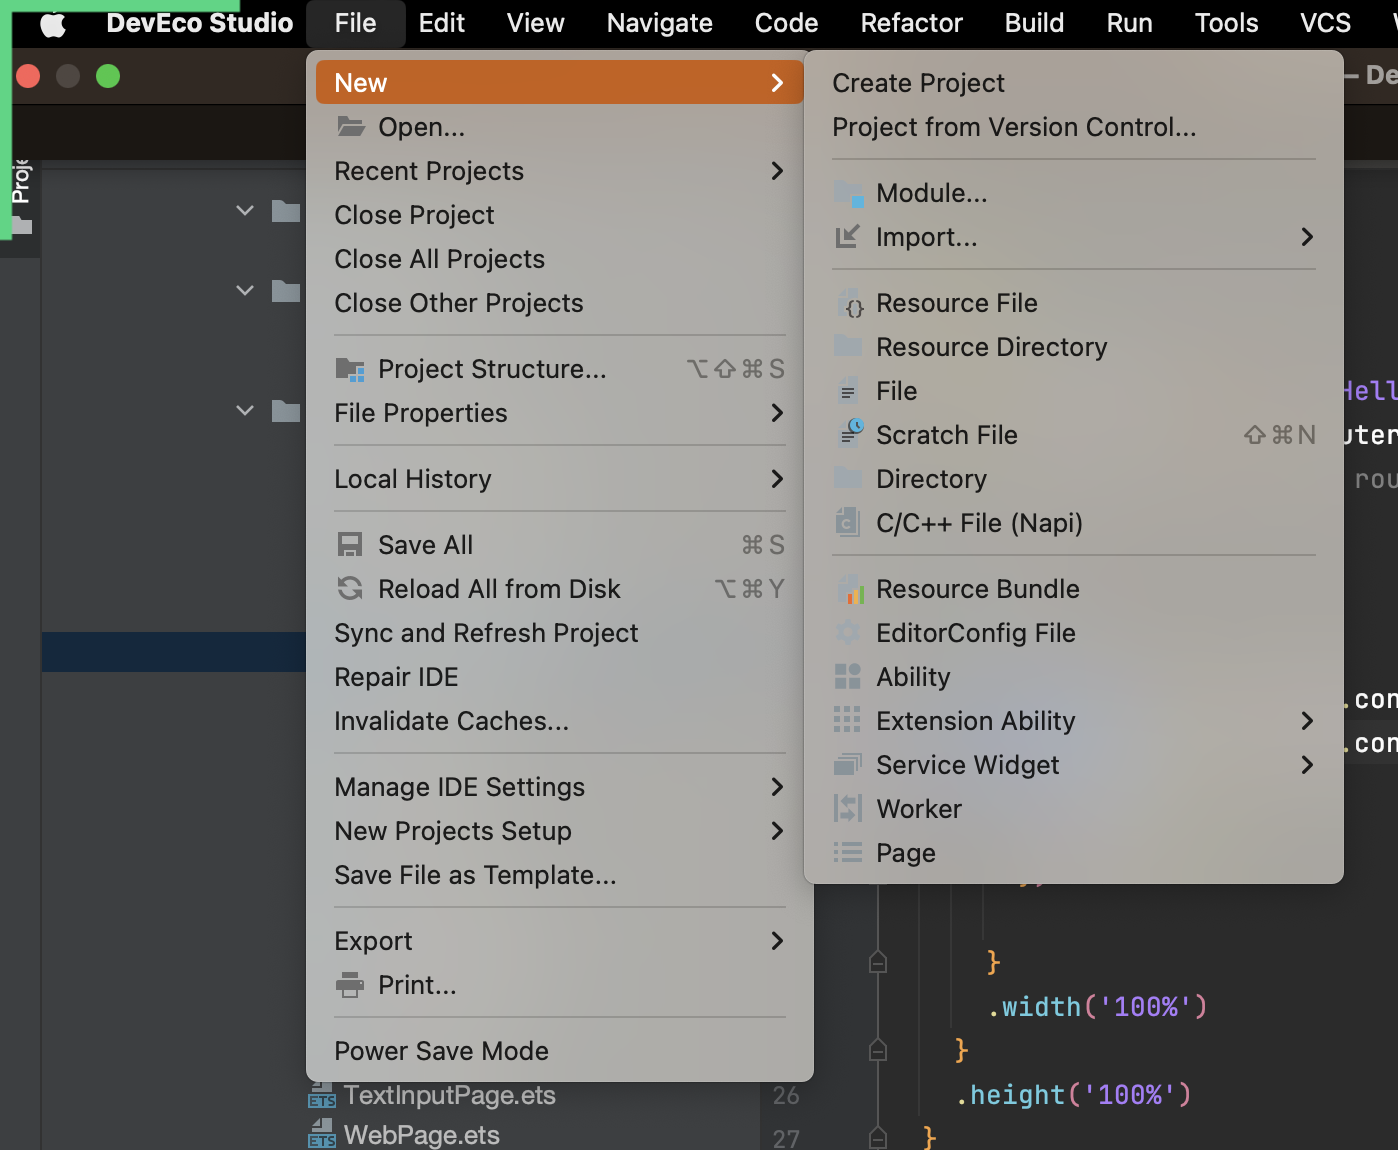
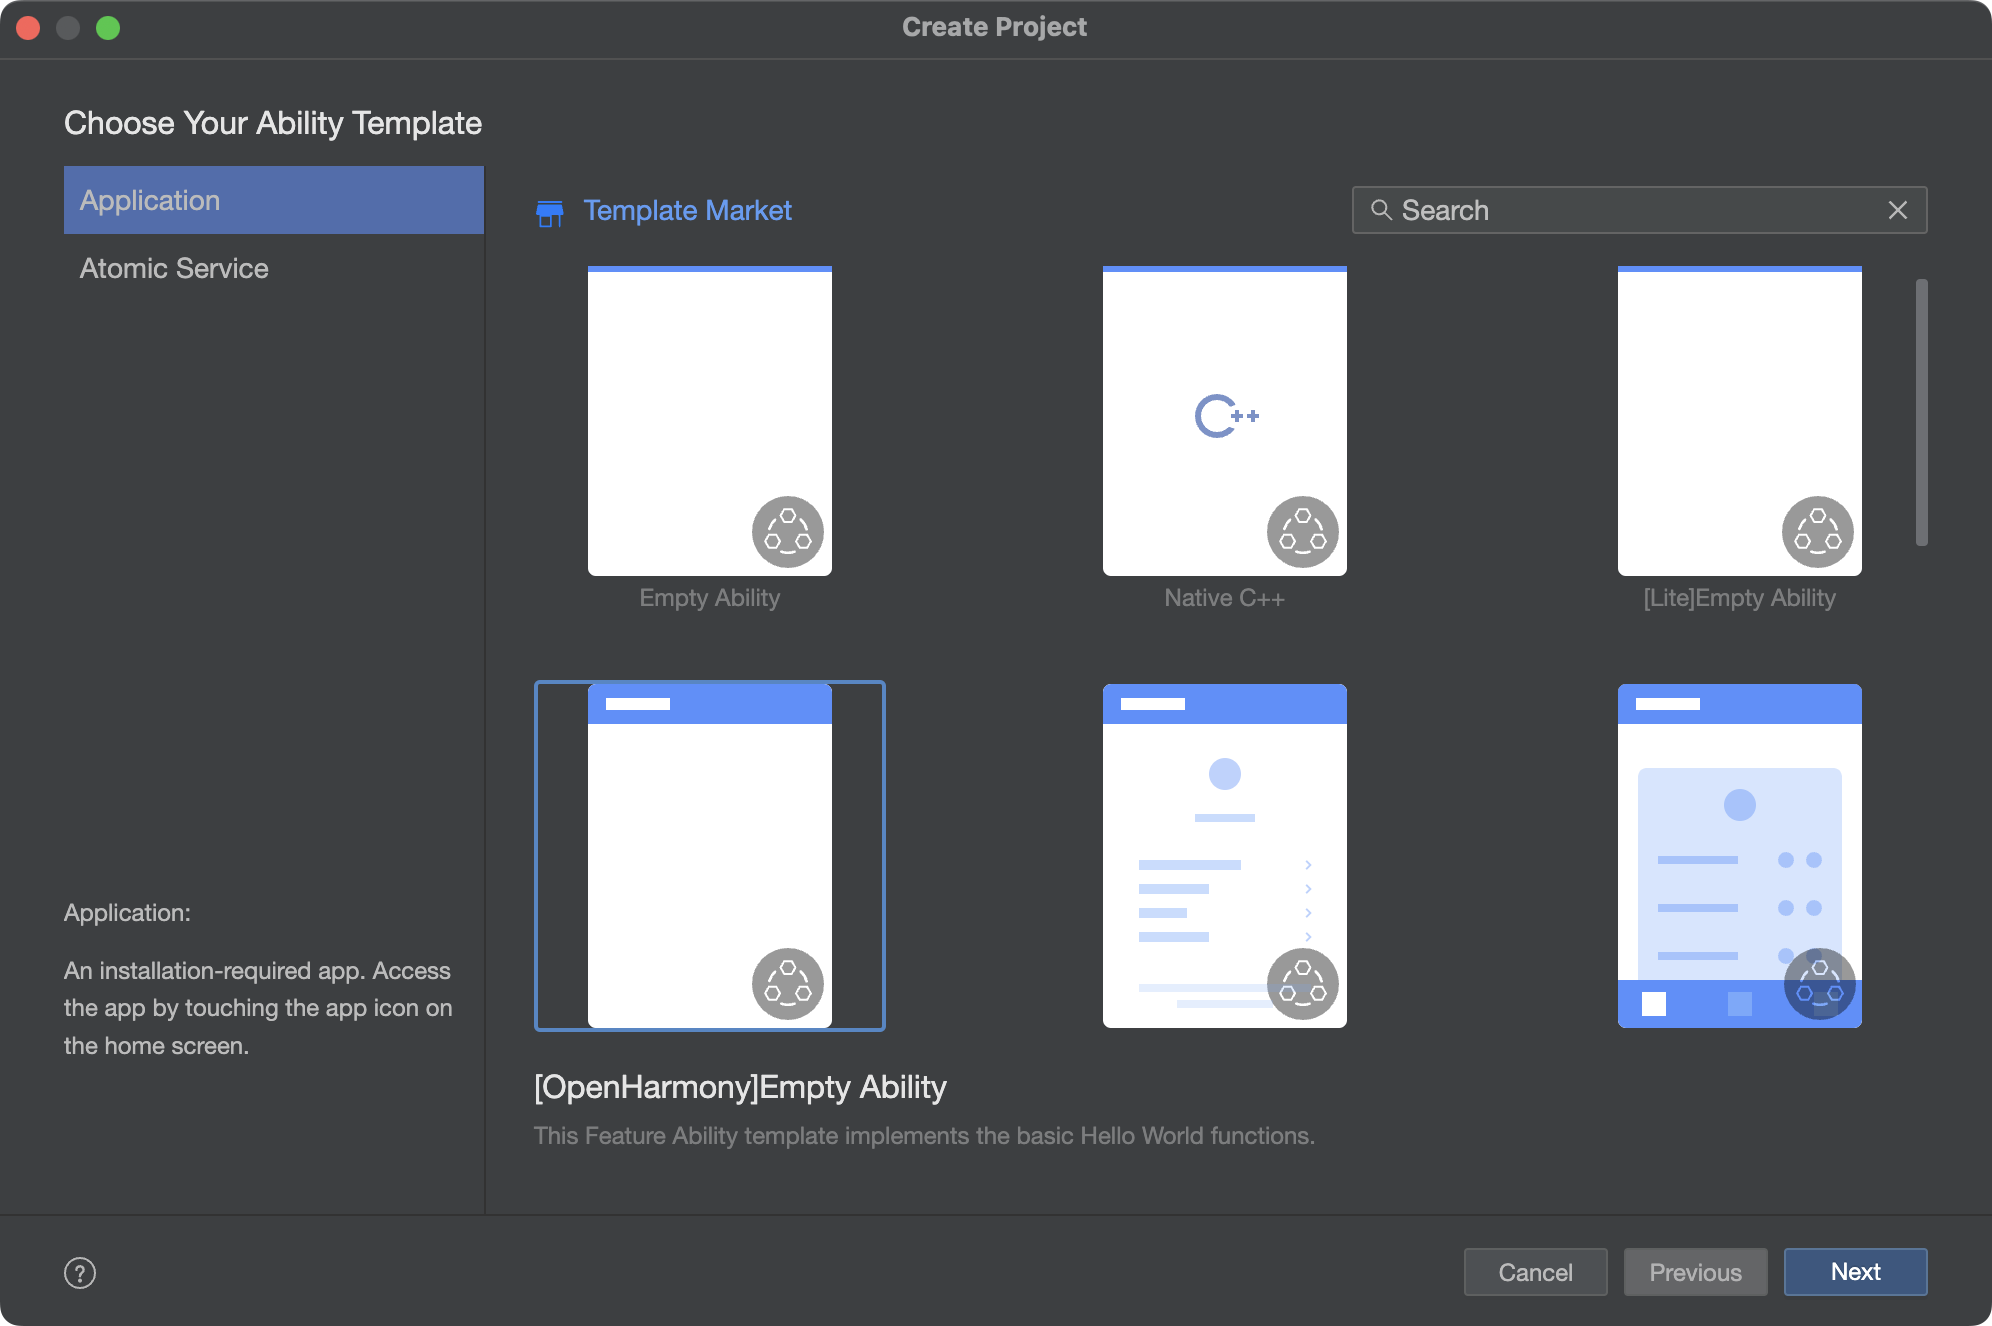
2.选择模版
【OpenHarmony】Empty Ability
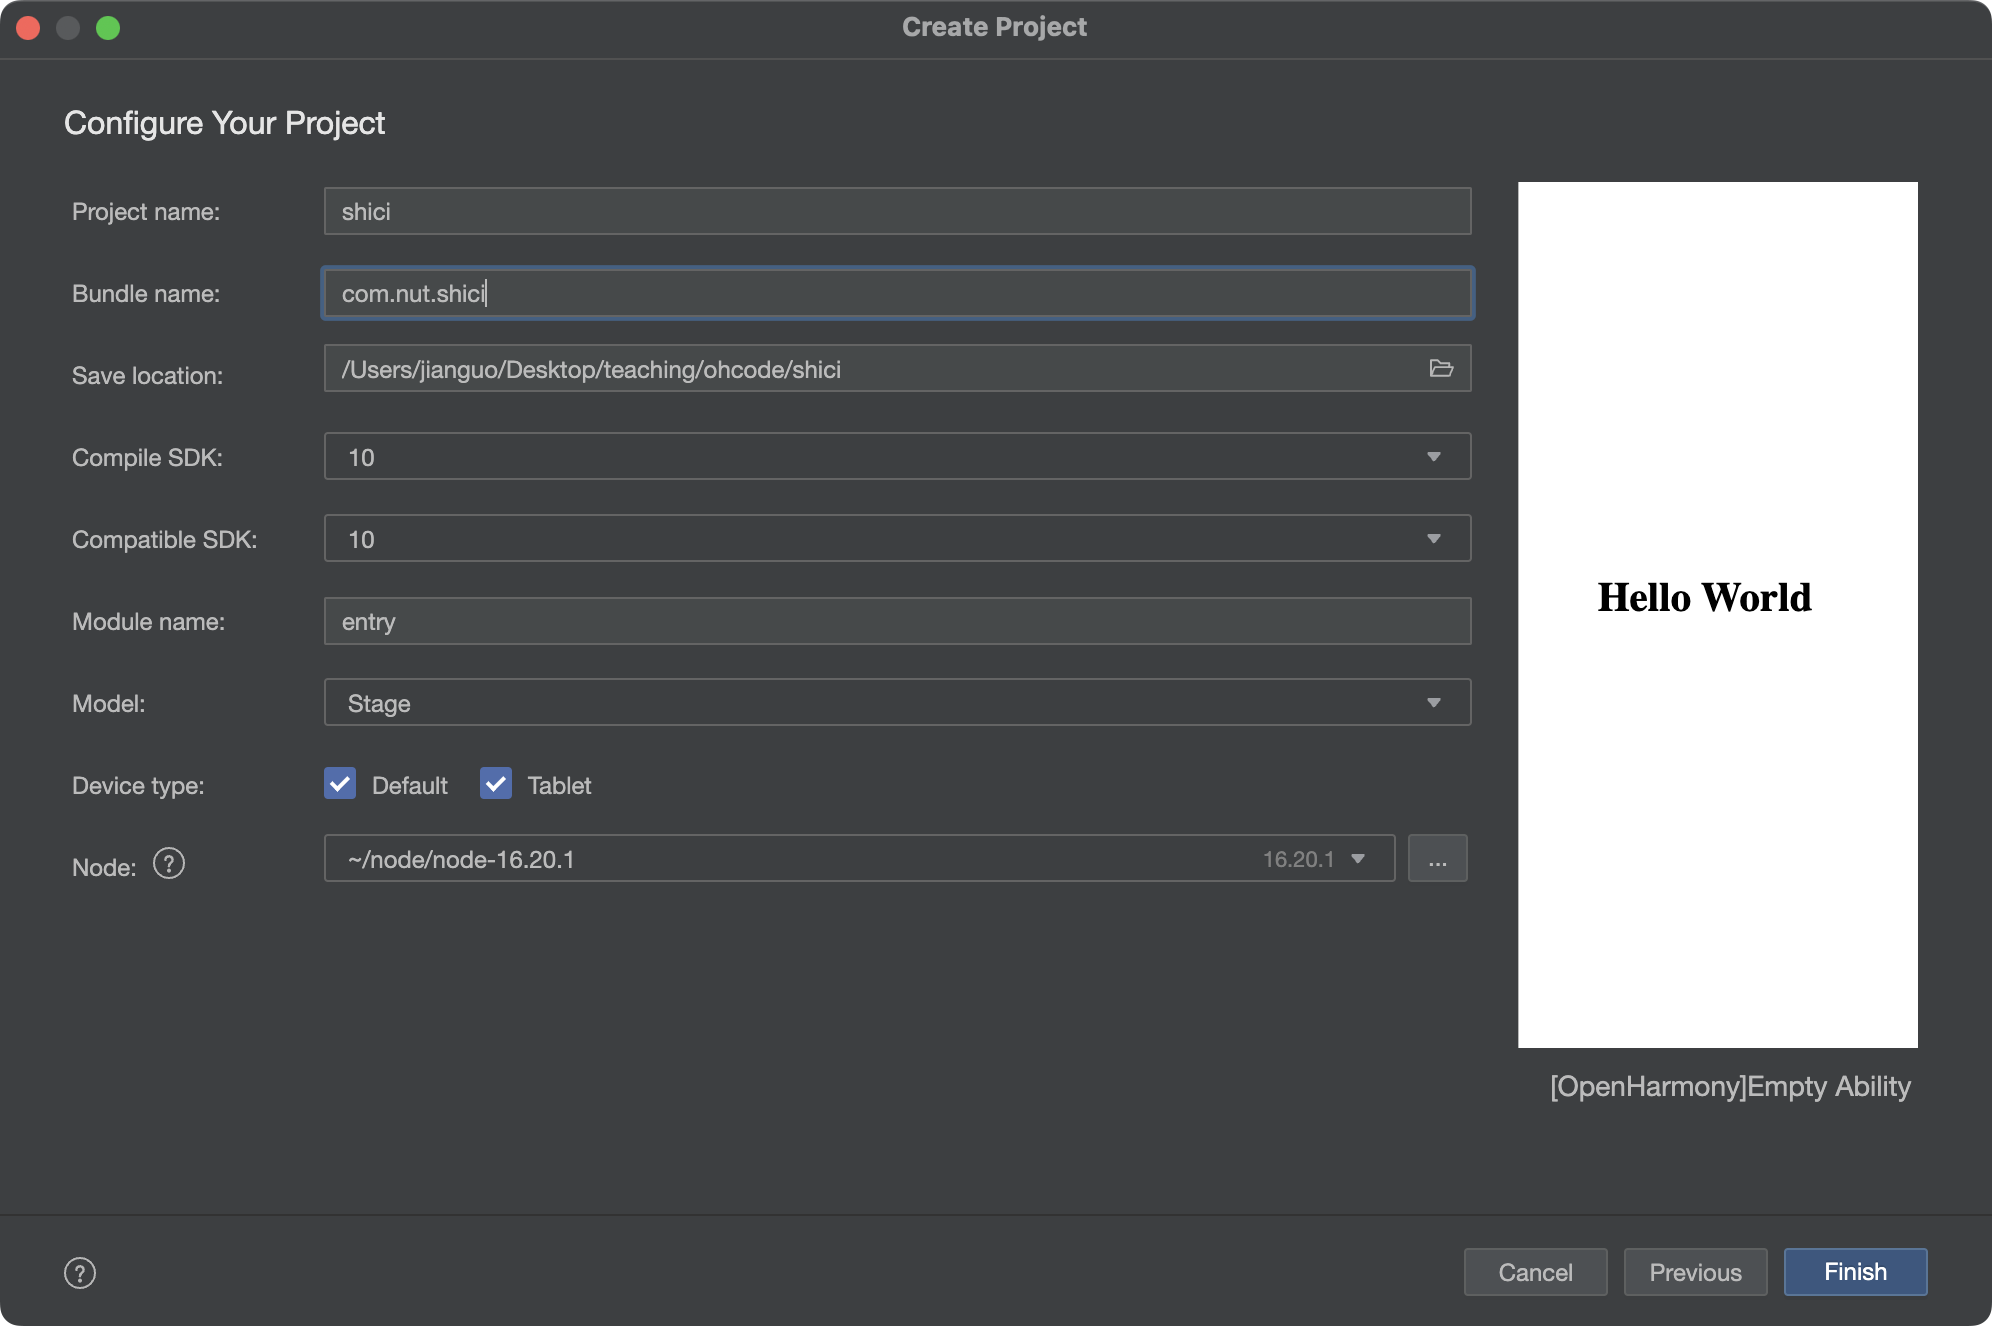
3.填写项目名,shici,应用包名com.nut.shici,应用存储位置XXX(不要有中文,特殊字符,空格)
Compile SDK12,Model :Stage
Device Type 默认就可以。
node,建议16.20.1
完成以上配置以后点击Finish
4.选择在新窗口打开,等待依赖加载完毕。如图所示。
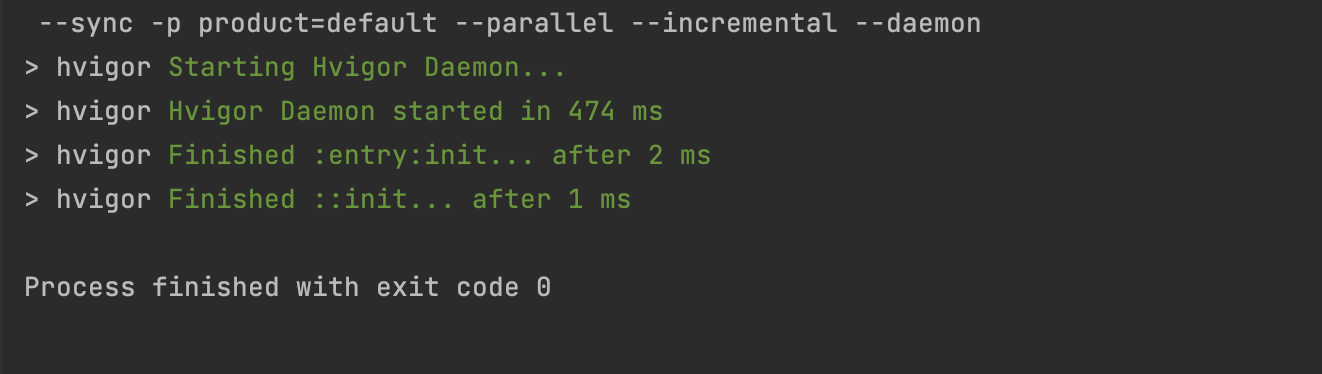
如果大家加载依赖报错的话,检查自己的网络。
二、运行HelloWord
1.给开发板供电,并连接开发板到电脑,如图所示

2.签名
签名的步骤:
点击File->Project struct
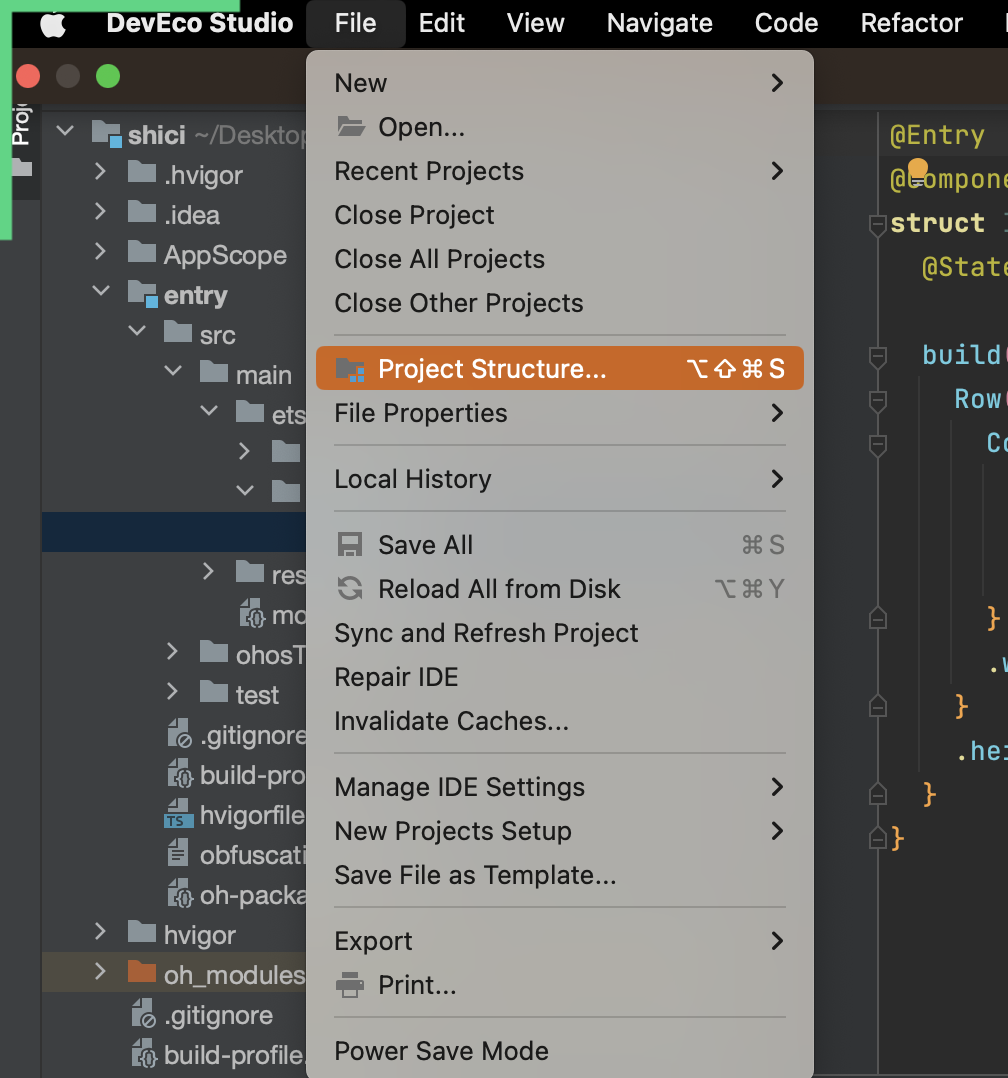
选择第三项Signing Configs,
这里我们只勾选Automatically generate就可以,不用勾选Suppot HarmonyOS,因为我们运行的是开发板。

点击Apply或者ok就可以,。
现在点击按钮运行项目。

控制台打印信息
$ hdc uninstall com.nut.shici
$ hdc shell mkdir data/local/tmp/a1bdb2dbe1724c67a1106c360a3f1d35
$ hdc file send "/Users/jianguo/Desktop/teaching/ohcode/shici/entry/build/default/outputs/default/entry-default-signed.hap" "data/local/tmp/a1bdb2dbe1724c67a1106c360a3f1d35"
$ hdc shell bm install -p data/local/tmp/a1bdb2dbe1724c67a1106c360a3f1d35
$ hdc shell rm -rf data/local/tmp/a1bdb2dbe1724c67a1106c360a3f1d35
$ hdc shell aa start -a EntryAbility -b com.nut.shici
证明项目已经成功运行在开发板上。
三、修改图标和名称
修改应用图标和名称:
目录在AppScope/app.json5
{
  "app": {
    "bundleName": "com.nut.shici",
    "vendor": "example",
    "versionCode": 1000000,
    "versionName": "1.0.0",
    "icon": "$media:app_icon",
    "label": "$string:app_name"
  }
}
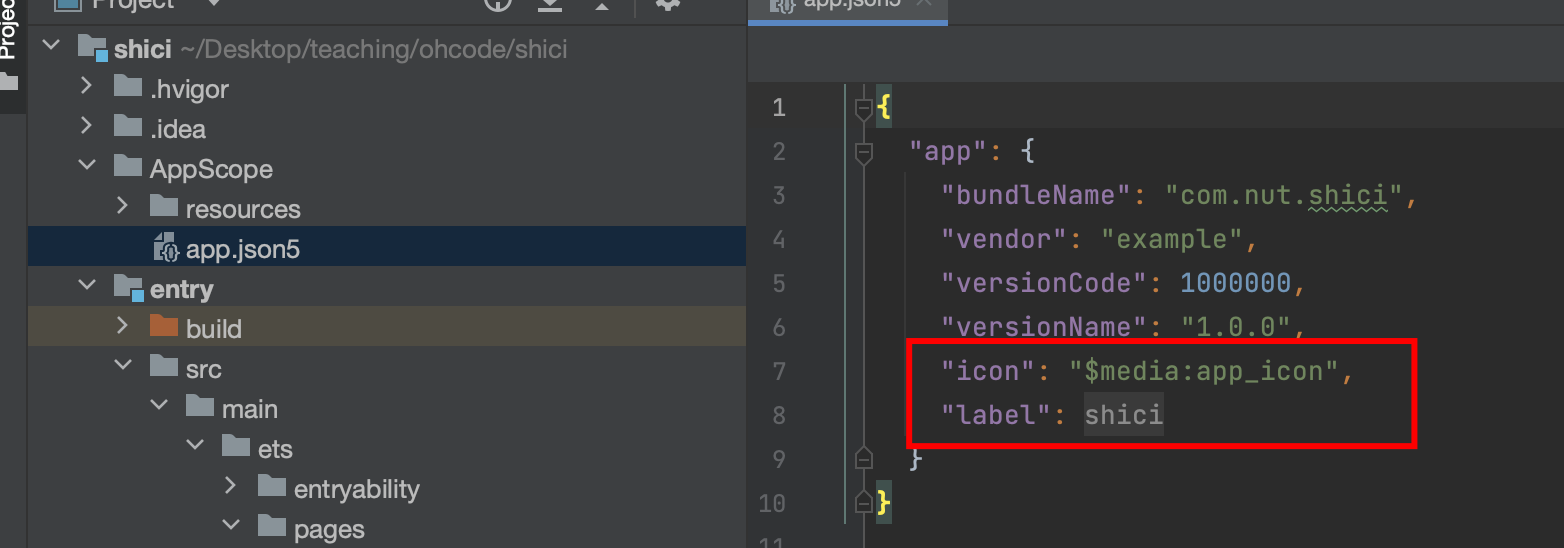
修改完毕之后如图所示

修改成功之后,如图所示
打开方式,在设置-应用管理一栏。

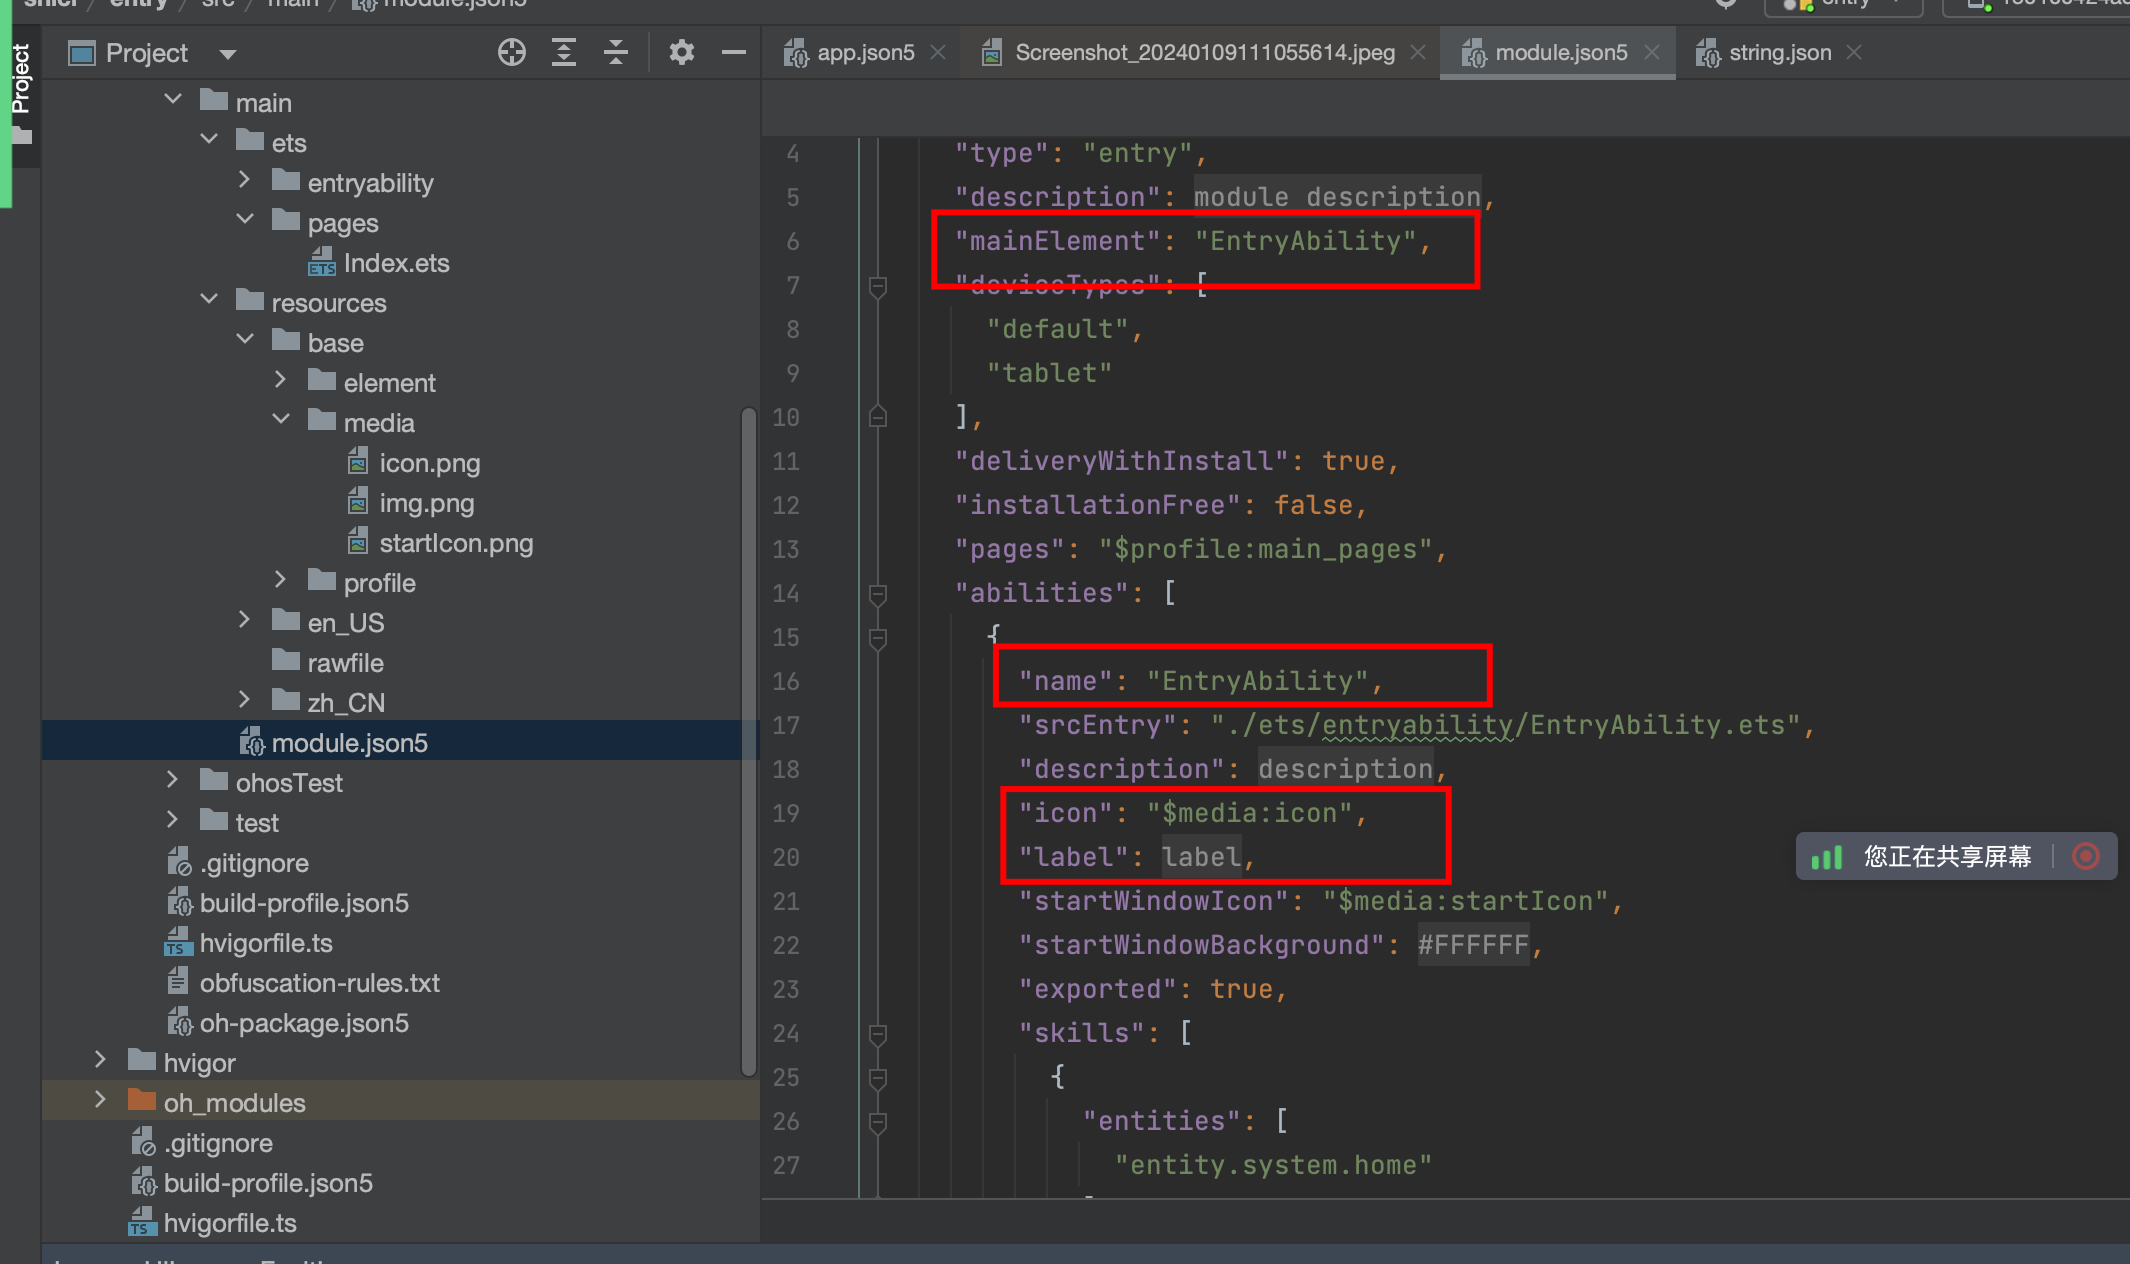
修改桌面图标和名称
修改src/main/module.json5中如图所示的label和icon。
我们修改label的时候,修改中文目录下的就可以
{
  "module": {
    "name": "entry",
    "type": "entry",
    "description": "$string:module_desc",
    "mainElement": "EntryAbility",
    "deviceTypes": [
      "default",
      "tablet"
    ],
    "deliveryWithInstall": true,
    "installationFree": false,
    "pages": "$profile:main_pages",
    "abilities": [
      {
        "name": "EntryAbility",
        "srcEntry": "./ets/entryability/EntryAbility.ets",
        "description": "$string:EntryAbility_desc",
        "icon": "$media:icon",
        "label": "$string:EntryAbility_label",
        "startWindowIcon": "$media:startIcon",
        "startWindowBackground": "$color:start_window_background",
        "exported": true,
        "skills": [
          {
            "entities": [
              "entity.system.home"
            ],
            "actions": [
              "action.system.home"
            ]
          }
        ]
      }
    ]
  }
}
修改中文目录下的

效果如图所示

四、添加相关权限
因为需要用到网络数据,所以添加initent权限。
在src/main/module.json5中modele中添加配置,然后async就可以。
"requestPermissions": [{
   "name": "ohos.permission.INTERNET"
 }],

五、定义数据模型
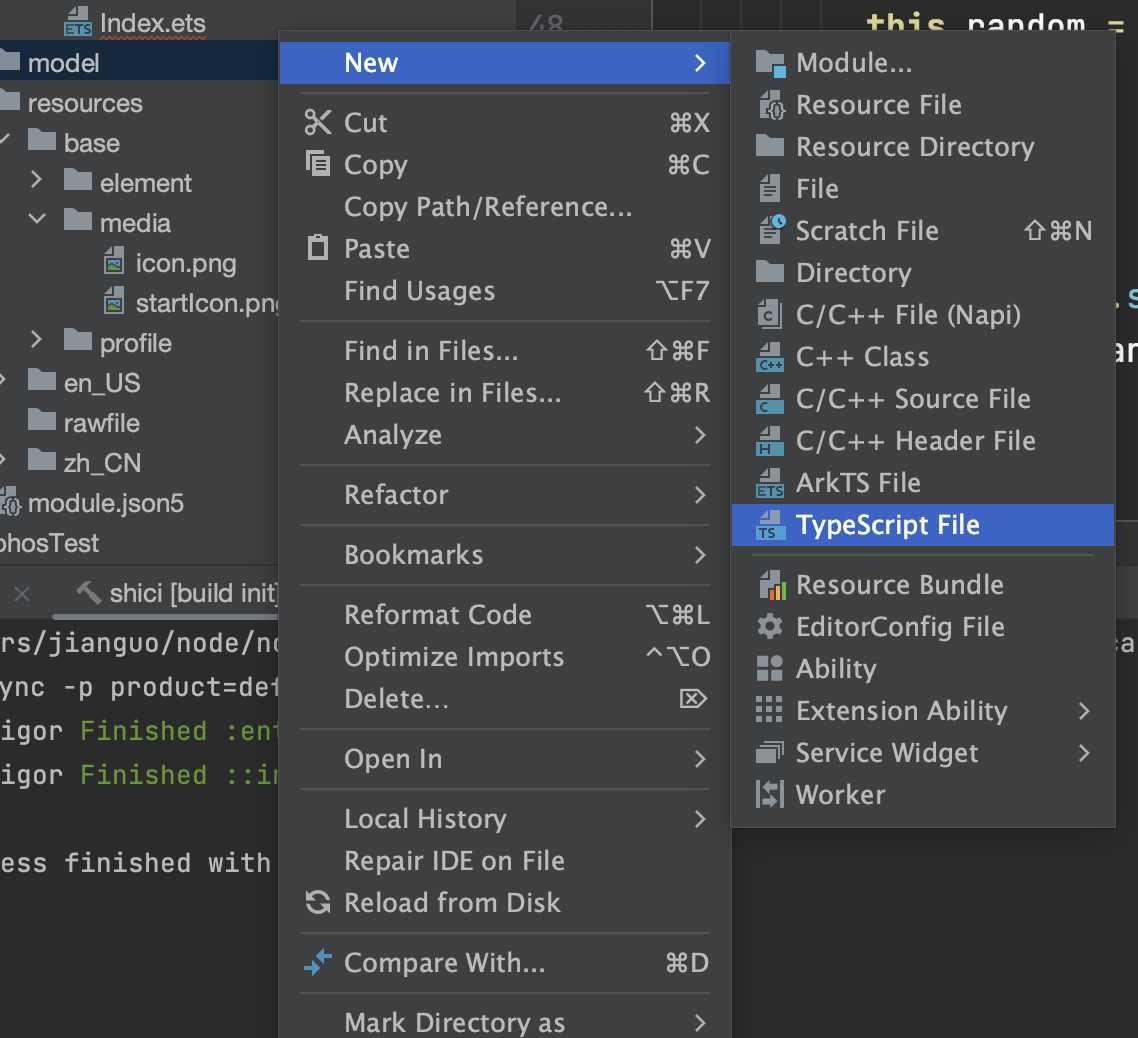
1.在ets目录下新建model文件夹
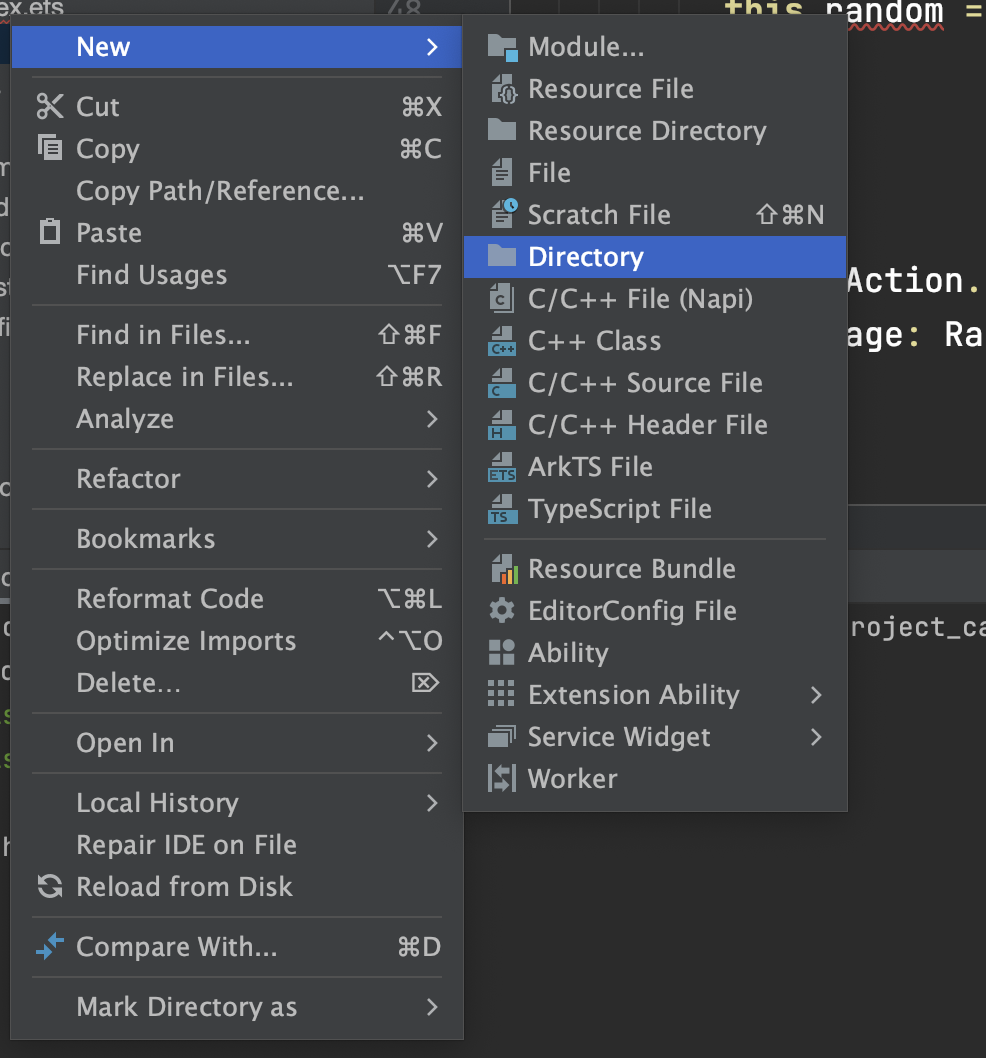
2.新建TS File
export class ShiciModel {
  code: number = 0
  message: string = ""
  data: ShiCi = new ShiCi()
}

export class ShiCi {
  content: string = ""
  author: string = ""

  origin: string = ""
  category: string = ""
  c1: string = ""
  c2: string = ""
  c3: string = ""

  // "content": "微雨过,小荷翻。榴花开欲然。",
  // "author": "苏轼",
  // "origin": "阮郎归·初夏",
  // "category": "古诗文-植物-荷花",
  // "c1": "gushiwen",
  // "c2": "zhiwu",
  // "c3": "hehua"
}
六、加载网络数据
接口说明
准备好数据,
接口地址: https://v2.alapi.cn/api/shici
请求方法: [ "GET", "POST"]
请求参数:
| 名称 | 必填 | 类型 | 描述 | 示例 |
|---|---|---|---|---|
| token | true | string | 请求token,用户中心获取。 | 用户中心获取token |
| format | false | string | 返回格式,支持json,text | json |
| type | string | 诗词类型 | all |
type 参数值说明
all 所有类型
shuqing抒情
siji四季
shanshui山水
tianqi天气
renwu人物
shenghuo生活
jieri节日
dongwu动物
zhiwu植物
返回参数:
| 名称 | 描述 |
|---|---|
| content | 诗词内容 |
| author | 作者 |
| origin | 诗词题 |
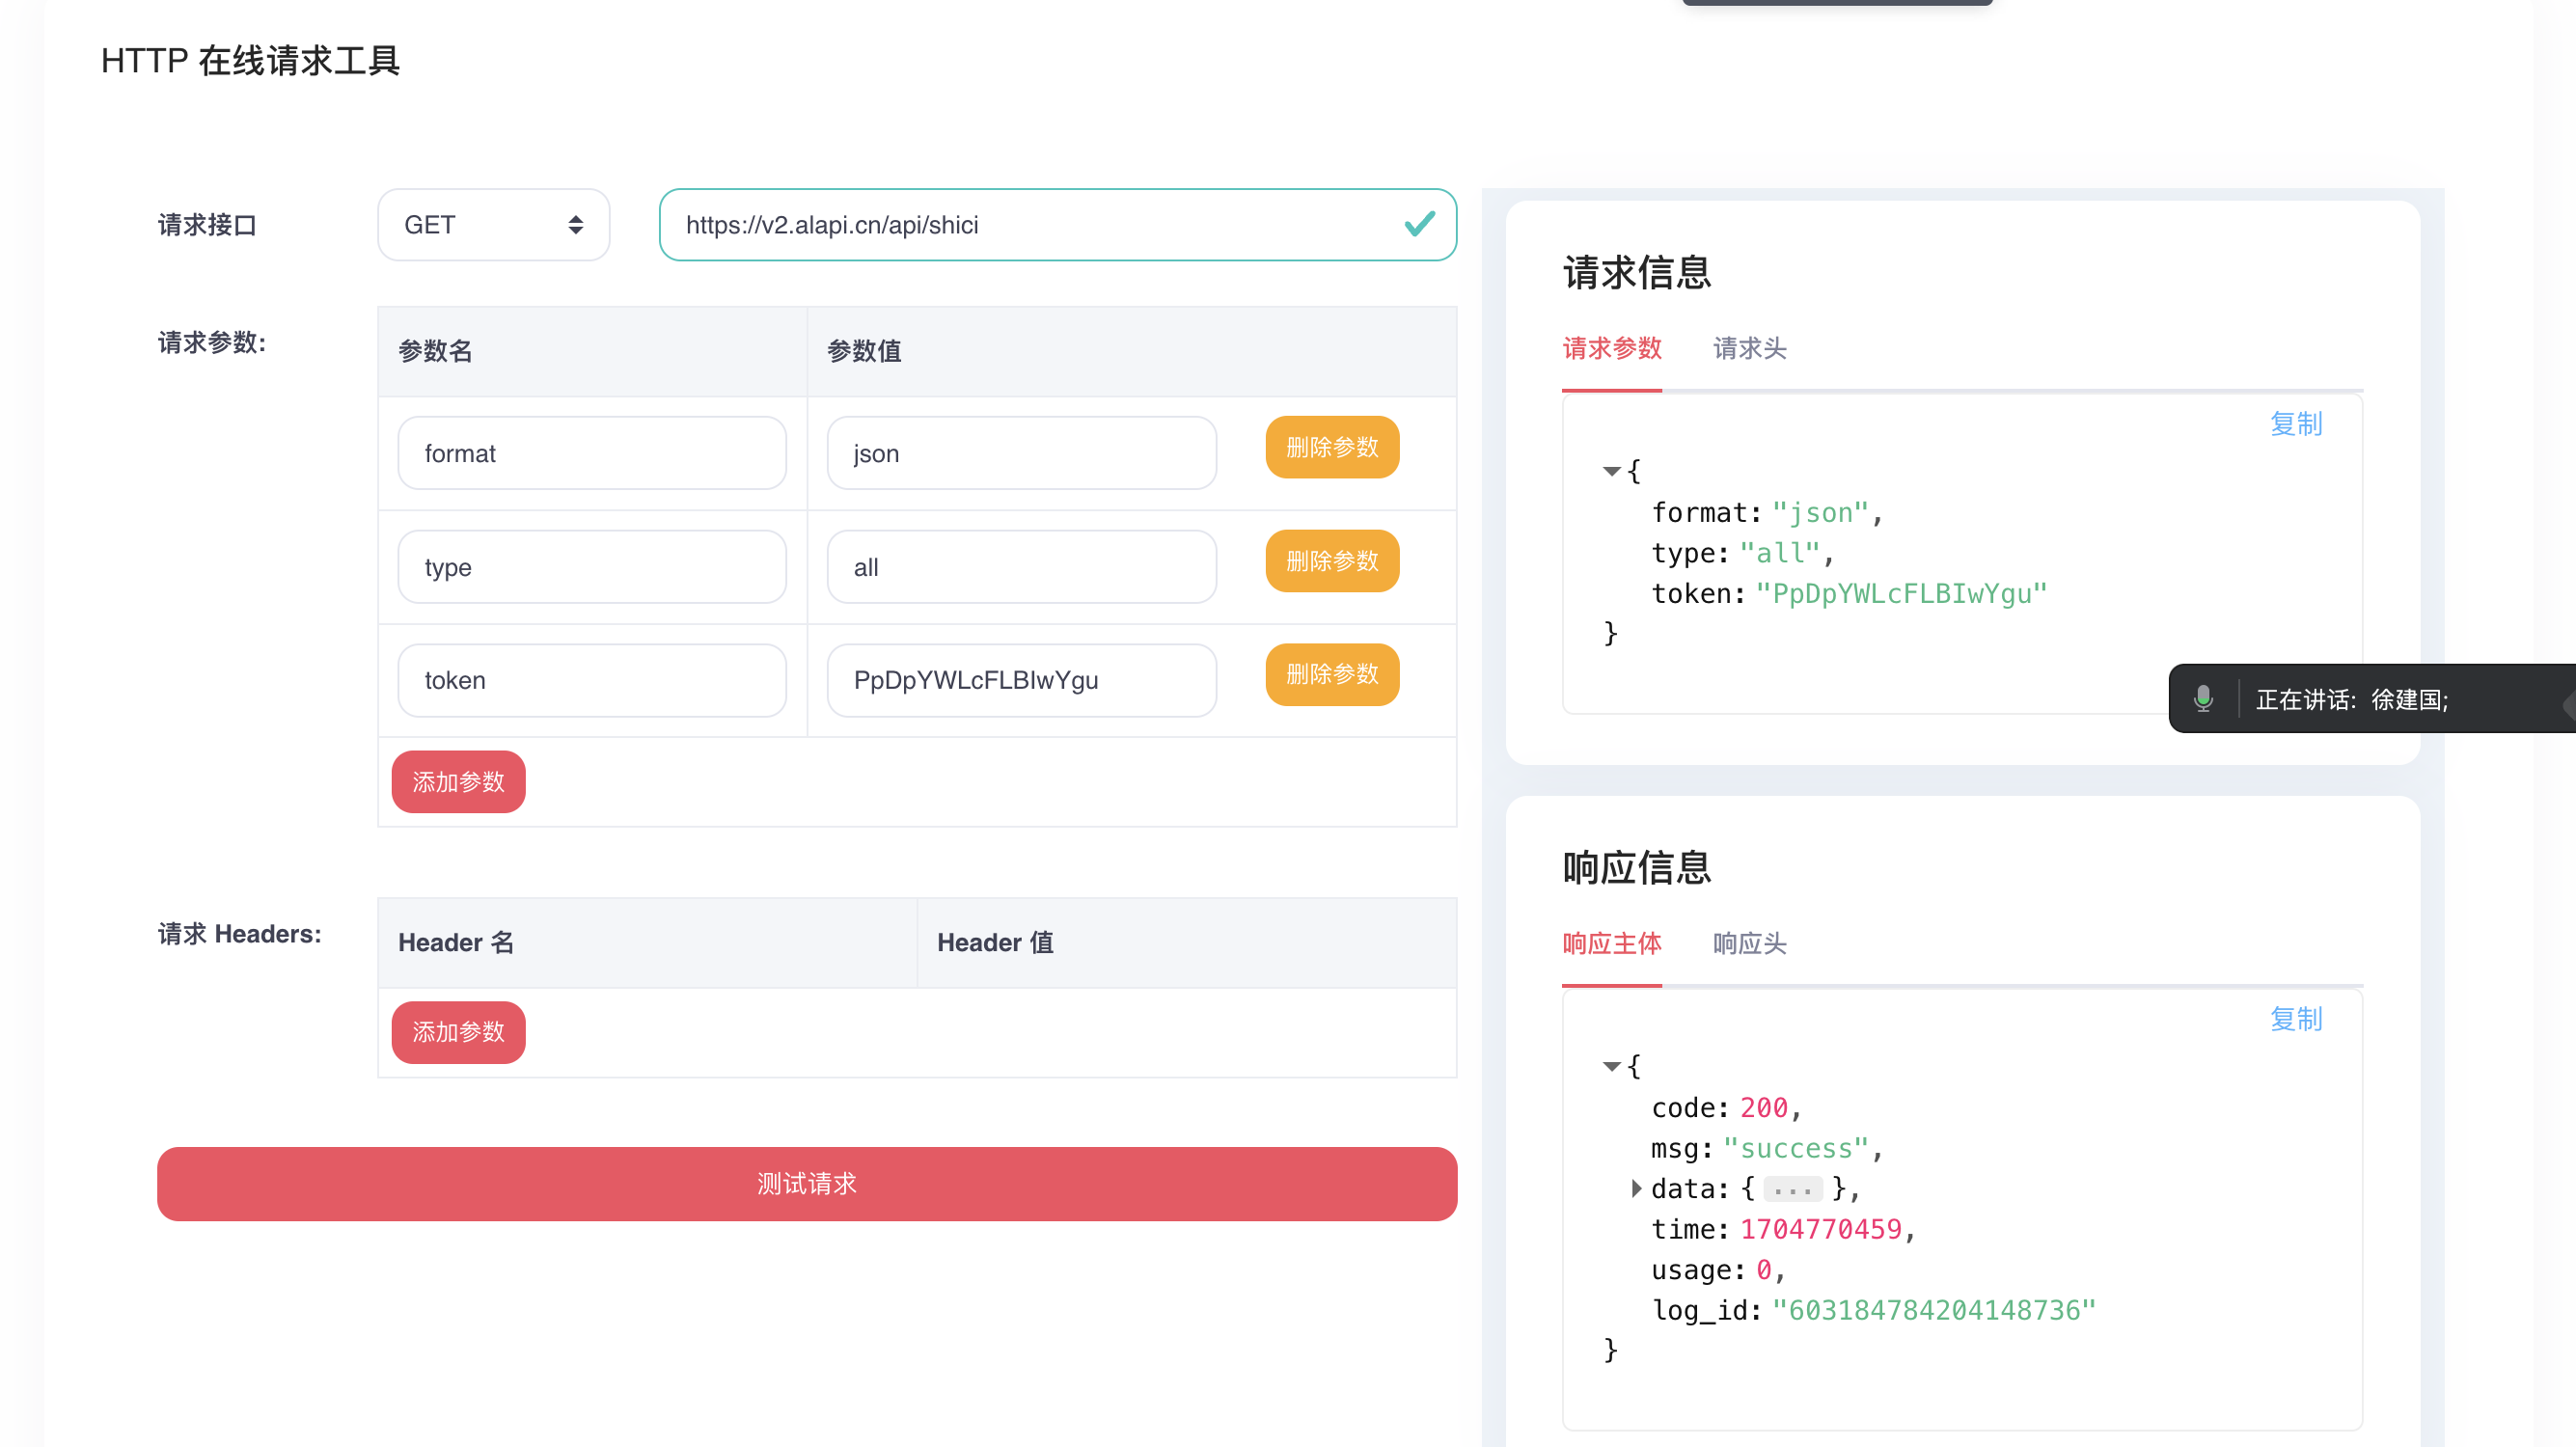
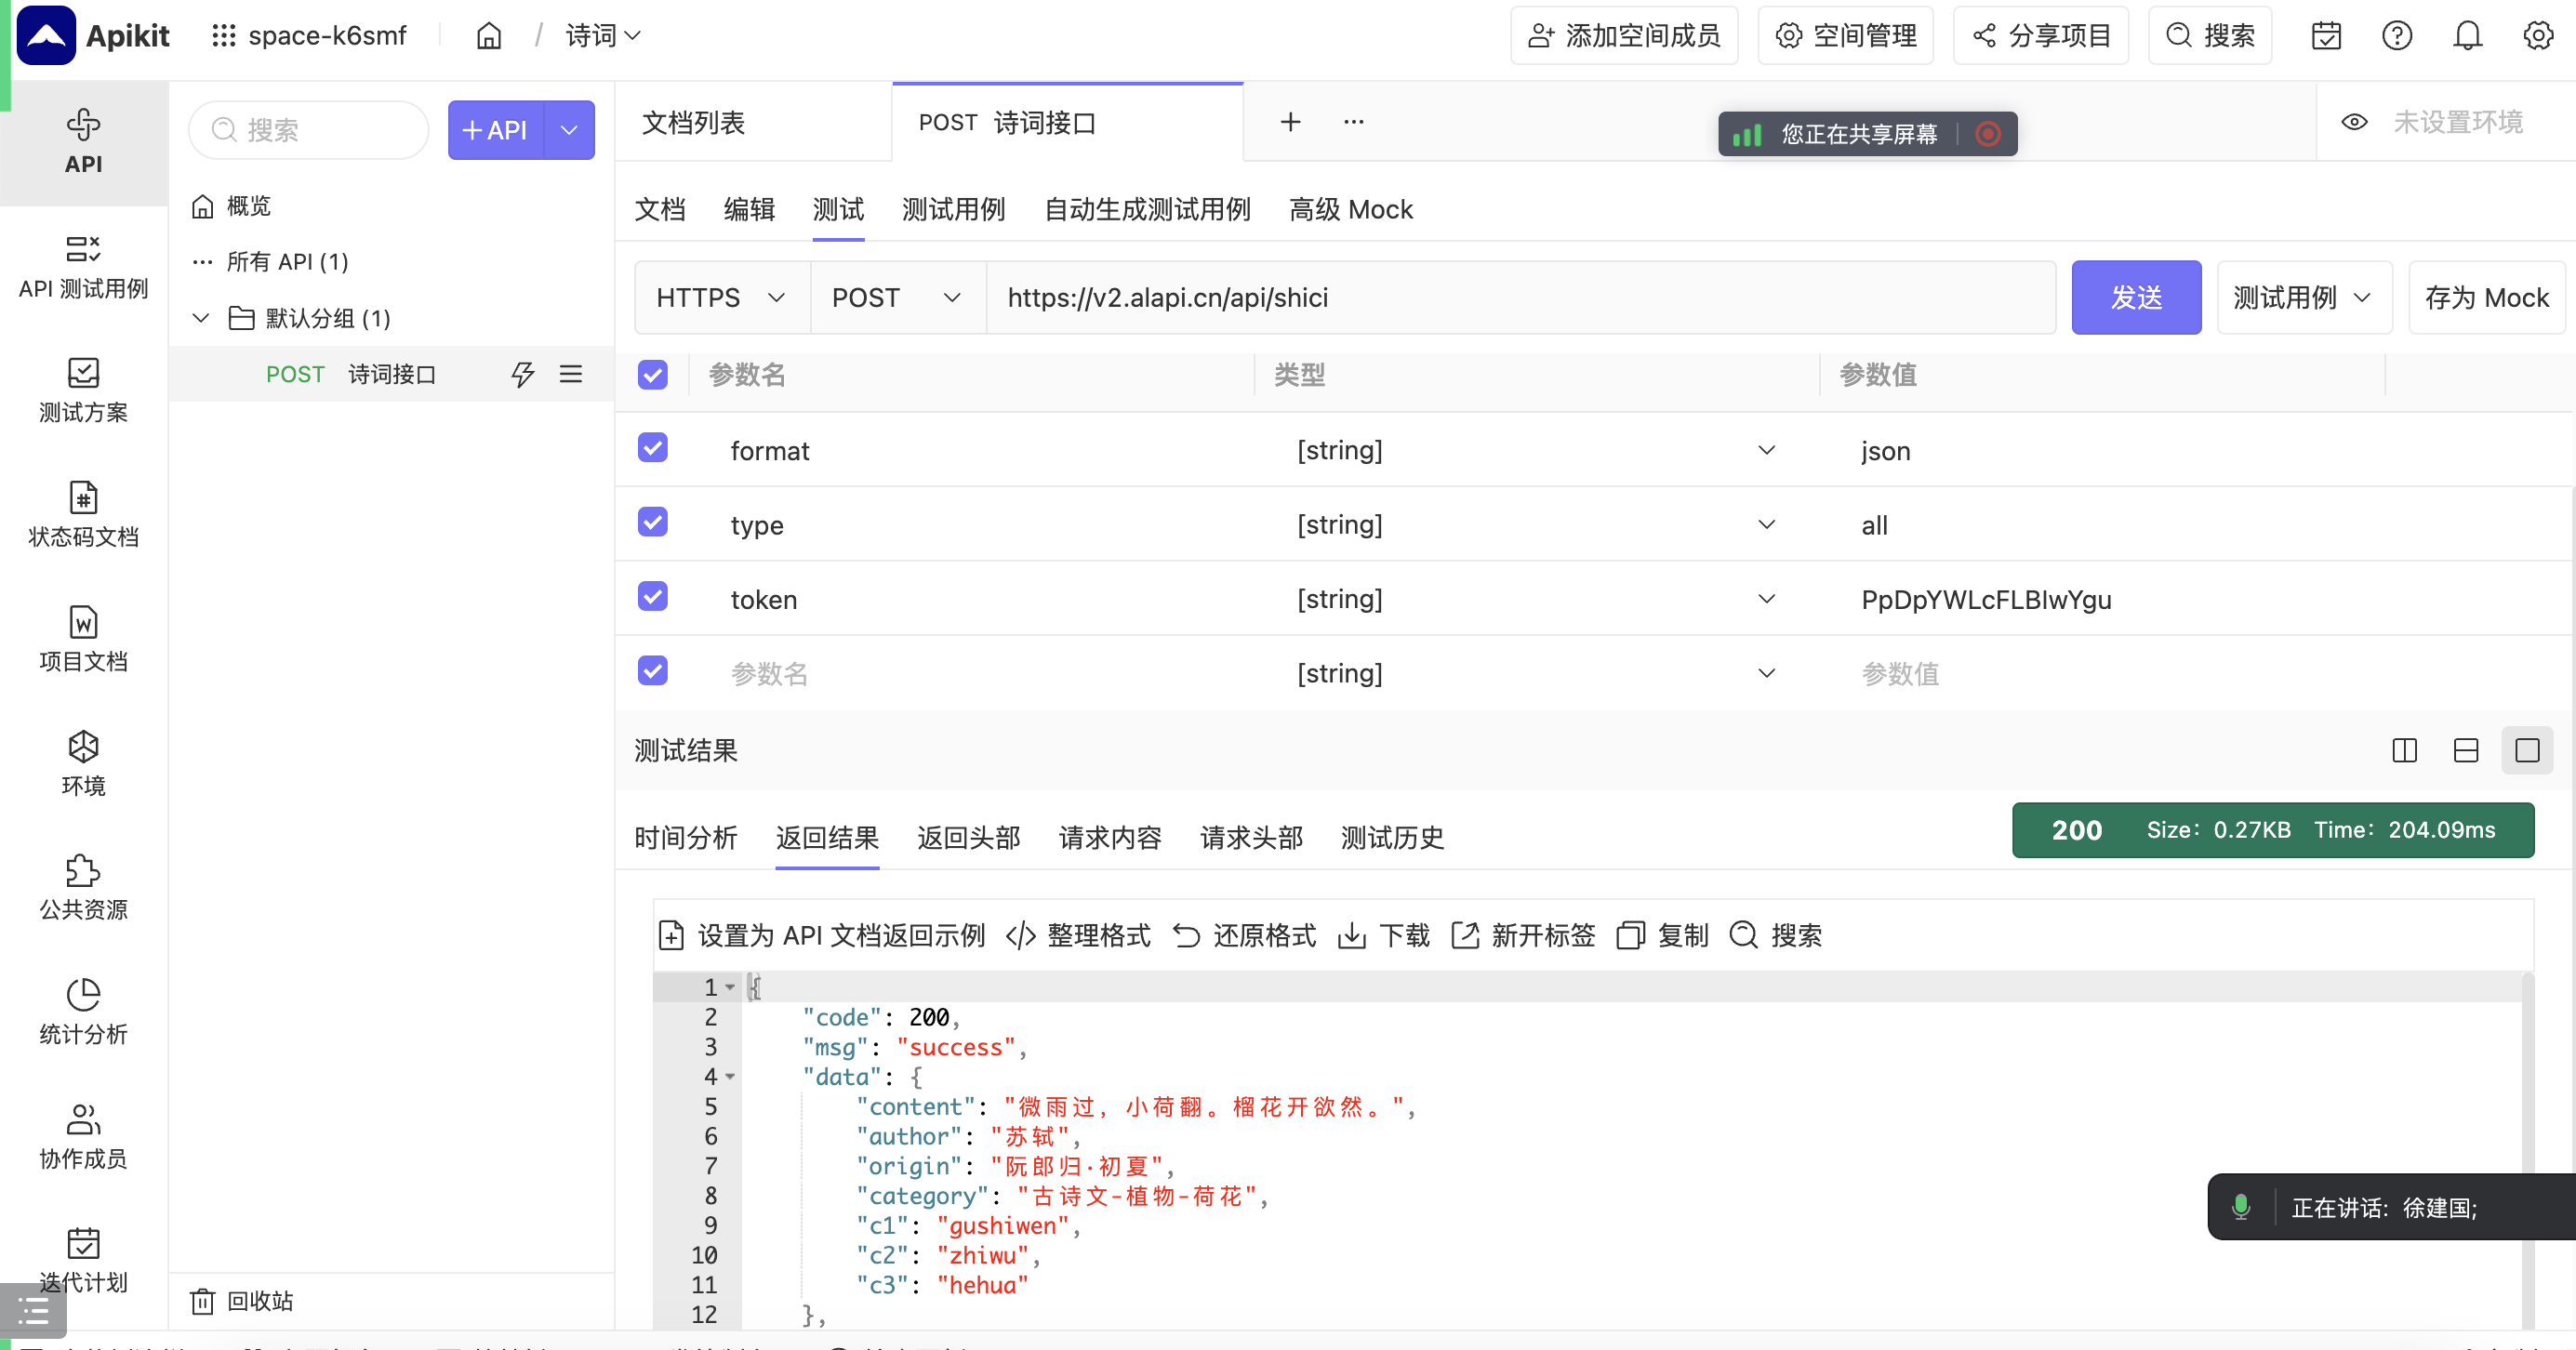
测试接口
测试工具:Postamn
{
  "code": 200,
  "msg": "success",
  "data": {
    "content": "地冷叶先尽,谷寒云不行。",
    "author": "李白",
    "origin": "冬日归旧山",
    "category": "古诗文-植物-叶子",
    "c1": "gushiwen",
    "c2": "zhiwu",
    "c3": "yezi"
  },
  "time": 1704770459,
  "usage": 0,
  "log_id": "603184784204148736"
}

测试如图所示
创建HTTP请求
1.导入http模块
import http from '@ohos.net.http';
import { BusinessError } from '@ohos.base';
2.创建createHttp
let httpRequest = http.createHttp();
3.填写HTTP地址
httpRequest.request(// 填写HTTP请求的URL地址,可以带参数也可以不带参数。URL地址需要开发者自定义。请求的参数可以在extraData中指定
      "https://v2.alapi.cn/api/shici",
      {
        method: http.RequestMethod.GET, // 可选,默认为http.RequestMethod.GET
        // // 开发者根据自身业务需要添加header字段
        header: [{
          'Content-Type': 'application/json'
        }],
        // 当使用POST请求时此字段用于传递内容
        extraData: {
          "token": "自己的token",
          "type": "all",
          "format": "json"
        },

      }, (err: BusinessError, data: http.HttpResponse) => {

    }
    );
4.对网络数据的处理
    if (!err) {


        // data.result为HTTP响应内容,可根据业务需要进行解析
        console.info('Result:' + JSON.stringify(data.result));
        console.info('code:' + JSON.stringify(data.responseCode));
        // data.header为HTTP响应头,可根据业务需要进行解析
        console.info('header:' + JSON.stringify(data.header));
        console.info('cookies:' + JSON.stringify(data.cookies)); // 8+
        // 当该请求使用完毕时,调用destroy方法主动销毁
        httpRequest.destroy();
      } else {
        this.message = JSON.stringify(err)
        console.error('error:' + JSON.stringify(err));
        // 取消订阅HTTP响应头事件
        httpRequest.off('headersReceive');
        // 当该请求使用完毕时,调用destroy方法主动销毁
        httpRequest.destroy();
      }
完成以上配置以后
5.在应用程序里测试网络请求
  build() {

    Column() {

      Button("测试网络请求").onClick(() => {
        this.httpData()
      })
    }.width("100%").height("100%").justifyContent(FlexAlign.Center)
  }
}
如图所示

测试成功
如果2300006错误码,请检查网络
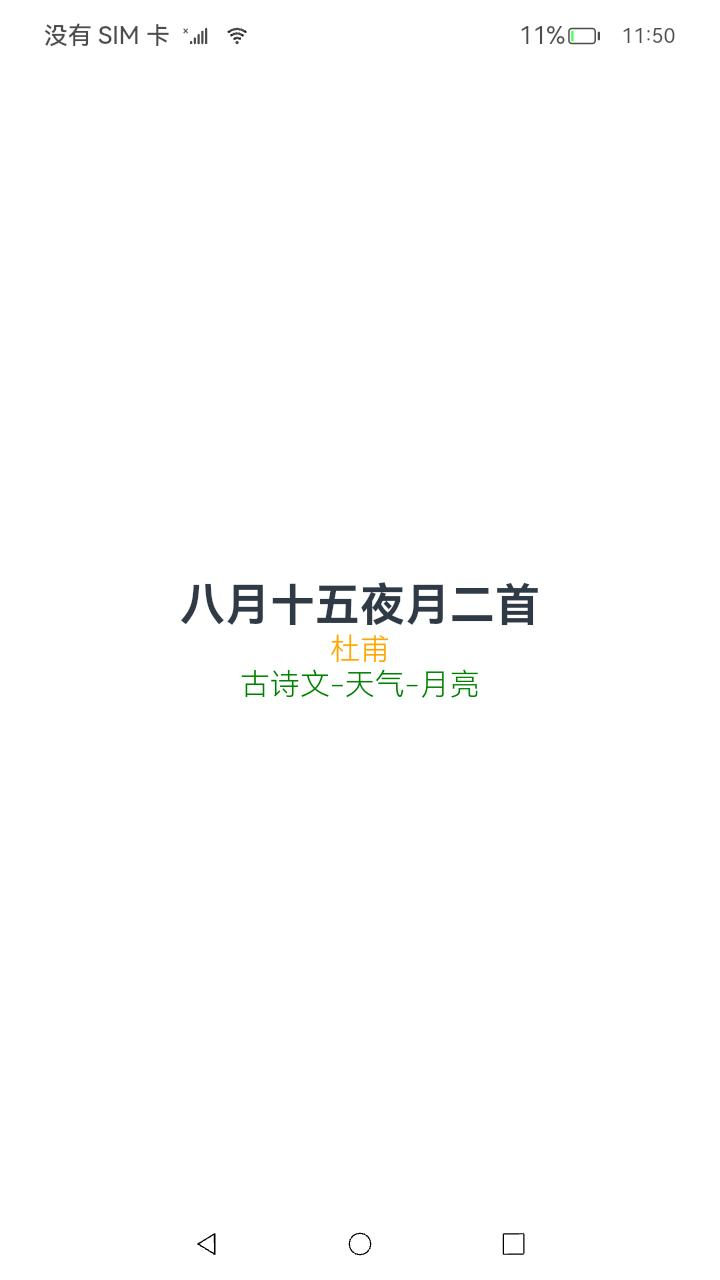
七、UI
数据获取到之后,我们就剩在页面上显示了。
U I布局如图所示。
build() {

  Column() {
    Text(this.shici.origin).fontSize(30).fontWeight(800)
    Text(this.shici.author).fontSize(20).fontWeight(300).fontColor(Color.Orange)
    Text(this.shici.category).fontSize(20).fontWeight(300).fontColor(Color.Green)


  }.width("100%").height("100%").justifyContent(FlexAlign.Center)
}
八、完整源码
import http from '@ohos.net.http';
import { BusinessError } from '@ohos.base';
import promptAction from '@ohos.promptAction';
import { ShiCi, ShiciModel } from '../../model/ShiCiModel';


class shiciType {
  title: string = ""
  desc: string = ""
}

@Entry
@Component
struct Index {
  @State shici: ShiCi = new ShiCi()
  @State typeList: Array<shiciType> = [
    { title: "抒情",
      desc: "shuqing"

    },
    { title: "四季",
      desc: "siji"

    },
    { title: "山水",
      desc: "shanshui"

    }
    ,
    { title: "天气",
      desc: "tianqi"

    }


  ]

  aboutToAppear() {
    this.httpData("all")
  }

  httpData(type: string) {


    // 3.每一个httpRequest对应一个HTTP请求任务,不可复用
    let httpRequest = http.createHttp();
    //4.
    httpRequest.request(// 填写HTTP请求的URL地址,可以带参数也可以不带参数。URL地址需要开发者自定义。请求的参数可以在extraData中指定
      "https://v2.alapi.cn/api/shici",
      {
        method: http.RequestMethod.GET, // 可选,默认为http.RequestMethod.GET
        // // 开发者根据自身业务需要添加header字段
        header: [{
          'Content-Type': 'application/json'
        }],
        // 当使用POST请求时此字段用于传递内容
        extraData: {
          "token": "你的token",

          "type": type,
          "format": "json"
        },

      }, (err: BusinessError, data: http.HttpResponse) => {
      if (!err) {
        // data.result为HTTP响应内容,可根据业务需要进行解析
        console.info('Result:' + JSON.stringify(data.result));
        let ShiciModel: ShiciModel = JSON.parse(data.result.toString())
        this.shici = ShiciModel.data

        console.info('code:' + JSON.stringify(data.responseCode));

        // 当该请求使用完毕时,调用destroy方法主动销毁
        httpRequest.destroy();
      } else {

        console.error('error:' + JSON.stringify(err));
        // 取消订阅HTTP响应头事件
        httpRequest.off('headersReceive');
        // 当该请求使用完毕时,调用destroy方法主动销毁
        httpRequest.destroy();
      }
    }
    );
  }

  build() {

    Column() {


      Row() {
        ForEach(this.typeList, (item: shiciType) => {

          Text(item.title).fontSize(30).margin(20)
            .onClick(() => {

              this.httpData(item.desc)
            })
        })

      }

      Button(
        "抒情"
      ).onClick(() => {
        this.httpData("shuqing")
      })

      Button(
        "四季"
      ).onClick(() => {
        this.httpData("siji")
      })


      Text(this.shici.origin).fontSize(30).fontWeight(800)
      Text(this.shici.author).fontSize(20).fontWeight(300).fontColor(Color.Orange)
      Text(this.shici.category).fontSize(20).fontWeight(300).fontColor(Color.Green)


    }.width("100%").height("100%").justifyContent(FlexAlign.Center)
  }
}
九、总结
本文我们学习了基础组件的使用,网络请求,以及状态管理。
十、FAQ
2300006 域名解析失败
错误信息
Couldn’t resolve host name.
错误描述
服务器的域名无法解析。
可能原因
1.传入的服务器的URL不正确。
2.网络不通畅。
处理步骤
1.请检查输入的服务器的URL是否合理。
2.请检查网络连接情况