鸿蒙开发:自定义一个联系人模版
前言
本文基于Api13
右边是字母列表,左边是展示字母对应的列表,这种效果常见于通讯录,比如微信通讯录,也常见于手机的联系人,如下图所示:
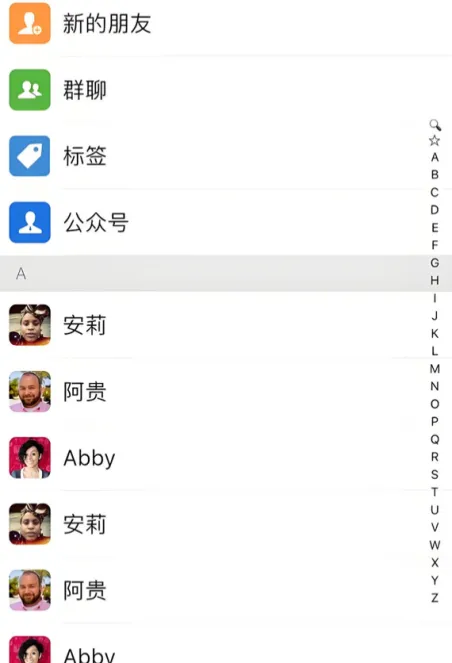
右边竖列的字母,可点击,也可随着手势进行滑动,而左边的列表则需要跟着手势自动的来切换对应字母下的信息,那么这种效果,如何实现呢?记得之前从事Android时,右边的字母列表是用Canvas来绘制的,方便针对手势来测算当前滑动的字母,其实,鸿蒙当中也可以按照这种思路,不过,我们也可以直接使用List组件来搞定。
我们先一起看下最终的实现效果,基本满足,左侧列表可吸顶,右侧字母列表可滑动可点击,并且实现列表联动切换。
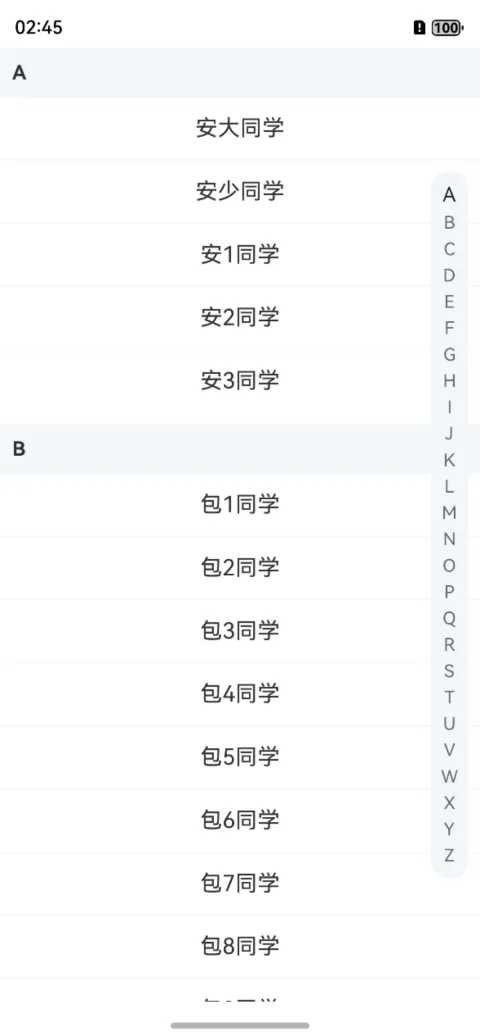
动态效果如下:

本文的主要内容大致如下:
1、实现字母列表展示
2、实现字母列表滑动和点击
3、实现左侧联系人列表展示
4、实现字母和联系人列表联动
5、源码
6、相关总结
一、实现字母列表展示
展示字母列表,首先得有字母数据,我们可以对A到Z的字母进行整合成一个字母数组,这里提供一个简单的方法,使用String.fromCharCode方法,可以很方便的遍历出字母,省的在一个一个敲打了,代码如下:
 for (let i = 65; i <= 90; i++) {
      this.letterList.push(String.fromCharCode(i))
    }
有数据源了,我们就可以使用List组件进行展示了,首先我们要知道,要实现的效果是字母列表靠右并垂直居中展示,所以,这里,不需要给List组件设置高度,让其自适应即可,外层我们可以使用RelativeContainer相对布局,这样,我们就可以使用属性alignRules来摆放位置。
靠右并垂直居中:
alignRules({
        right: { anchor: "__container__", align: HorizontalAlign.End },
        center: { anchor: "__container__", align: VerticalAlign.Center },
      })
List列表加载如下:
List({ space: 5 }) {
        ForEach(this.letterList, (item: string, index: number) => {
          ListItem() {
            Text(item)
              .fontColor("#666666")
              .fontSize(14)
          }
        })
      }
      .width(30)
      .backgroundColor("#f2f6f9")
      .margin({ right: 10 })
      .padding({ top: 10, bottom: 10 })
      .borderRadius(30)
      .alignListItem(ListItemAlign.Center)
      .alignRules({
        right: { anchor: "__container__", align: HorizontalAlign.End },
        center: { anchor: "__container__", align: VerticalAlign.Center },
      })
通过以上的代码,我们已经实现了字母列表靠右并垂直居中展示了。

二、实现字母列表滑动和点击
字母列表展示之后,我们需要实现的有以下几个功能:
1、每个字母可触发点击。
2、每个字母可触发滑动。
3、实现触摸到自身字母时,改变自身颜色和文字大小。
4、实现触摸到当前字母,在屏幕中间位置展示当前字母。
以上的几个功能是字母列表的基本设置,后续的和左侧列表联动也需要以上的事件进行驱动,所以,这几步,至关重要。
一开始的思路是,给每一个字母组件,也就是Text组件设置点击和移动,后续发现,单个设置,并不能影响到其它的组件,所以,还是需要给外层的List组件进行设置,关于点击和滑动,其实都可以使用手势来搞定。
如何根据手势来确定当前触摸的字母?其实很简单,因为我们是垂直的列表,只判断Y坐标即可,先获取每一个字母的Y坐标,当手势触摸的Y值大于和小于某一个值时,就证明是触摸此字母,例如,B字母,得到的Y坐标是20,那么触摸的Y坐标大于A字母的Y坐标并且小于B字母的Y坐标,是不是就是B字母区域了?
伪代码如下:
let A字母Y坐标 = 10
let B字母Y坐标 = 20
if(moveY>A字母Y坐标&&moveY<B字母Y坐标){
  //B字母
}
第一步,获取每个字母的Y坐标
首先定义一个用于存储所有字母位置的map集合:
private letterPositionMap: HashMap<string, number> = new HashMap()
然后,存储下每一个字母的Y坐标,可以通过onAreaChange方法来获取,这里,可以直接给每一个条目,也就是ListItem设置。
.onAreaChange((_: Area, newValue: Area) => {
            this.letterPositionMap.set(item, Number(newValue.position.y) + Number(newValue.height))
          })
第二步,实现onTouch方法,监听手势按下和移动
.onTouch((event) => {
        switch (event.type) {
          case TouchType.Down://手势按下
          case TouchType.Move://手势抬起
            this.changeStatus(event.touches[0].y);
            break
        }
      })
第三步,计算获取字母索引
  changeStatus(moveY: number) {
    const positions = this.letterList.map(letter => this.letterPositionMap.get(letter))
    let index = 0
    for (let i = 0; i < positions.length; i++) {
      if (moveY < positions[i]) {
        break
      }
      index = i + 1
    }

    //index就是触摸的每个字母的索引

  }
}
通过以上的步骤,我们就得到了每个字母的索引,下一步,我们就可以实现字母的颜色和文字大小改变,当然了,这里就需要把文字的颜色和大小使用装饰器来修饰了,就不能写死了;处理方式呢,可以使用对象,或者数组都可以,这里我们简单使用数组来表示。
更改样式
定义文字颜色和大小数组:
@State textFontSizeArray: Length[] = []
@State textFontColorArray: ResourceColor[] = []
设置默认值:
aboutToAppear(): void {
    for (let i = 65; i <= 90; i++) {
      this.letterList.push(String.fromCharCode(i))
      this.textFontSizeArray.push(14)
      this.textFontColorArray.push("#666666")
    }
  }
UI组件修改为定义的数组:
 Text(item)
              .fontColor(this.textFontColorArray[index])
              .fontSize(this.textFontSizeArray[index])
定义样式更改方法:
此方法的目的就是,先清除所有的样式,然后给指定索引的条目进行设置新的样式。
  latterChange(index: number) {
    this.textFontSizeArray.forEach((_, index) => {
      this.textFontSizeArray[index] = 14
      this.textFontColorArray[index] = "#666666"
    })
    this.textFontSizeArray[index] = 16
    this.textFontColorArray[index] = "#222222"
  }
在changeStatus方法中调用后,我们就看到文字样式已经发生了改变,紧接着,我们来实现中间展示字母的效果。
先定义一个用于展示字母的组件,让其在中间位置,并默认隐藏,letterSelect是定义的用于展示的字母,需要使用装饰器进行装饰。
Text(this.letterSelect)
        .visibility(this.letterSelect == undefined ? Visibility.None : Visibility.Visible)
        .backgroundColor("#f2f6f9")
        .fontColor("#222222")
        .fontWeight(FontWeight.Bold)
        .fontSize(18)
        .textAlign(TextAlign.Center)
        .width(50)
        .height(50)
        .borderRadius(50)
        .alignRules({
          middle: { anchor: "__container__", align: HorizontalAlign.Center },
          center: { anchor: "__container__", align: VerticalAlign.Center },
        })
在changeStatus方法中,动态改变letterSelect的值即可。
this.letterSelect = this.letterList[index]
需要注意的是,在手势抬起的时候,需要进行隐藏,这一点需要注意,为了能够隐藏不显得那么突兀,可以做下延迟处理。
case TouchType.Up: //手势抬起
            clearTimeout(this.timeoutId)
            this.timeoutId = setTimeout(() => {
              this.letterSelect = undefined
            }, 500)
            break
我们在看下实现的效果:
三、实现左侧联系人列表展示
左侧联系人就比较简单了,是一个可以吸顶操作的列表,还是先准备数据,因为牵扯到分组操作,所以定义数据上和普通稍有不同。
1、定义数据
定义一个接口,用于分组展示:
interface ListData {
  title: string;
  projects: string[];
}
定义测试数据,实际需要根据接口来设置。
 private listData: ListData[] = [
      {
        title: 'A',
        projects: ['安大同学', '安少同学', '安1同学', '安2同学', '安3同学']
      },
      {
        title: 'B',
        projects: ['包1同学', '包2同学', '包3同学', '包4同学', '包5同学', '包6同学', '包7同学', '包8同学', '包9同学']
      },
      {
        title: 'C',
        projects: ['蔡1同学', '蔡2同学', '蔡3同学', '蔡4同学', '蔡5同学', '蔡6同学', '蔡7同学', '蔡8同学', '蔡9同学']
      },
      {
        title: 'D',
        projects: ['杜1同学', '杜2同学', '杜3同学', '杜4同学', '杜5同学', '杜6同学']
      },
      {
        title: 'F',
        projects: ['范1同学', '范2同学', '范3同学', '范4同学', '范5同学', '范6同学', '范7同学']
      },
      {
        title: 'L',
        projects: ['李大同学', '李2同学', '李3同学', '李4同学', '李5同学', '李6同学']
      },
      {
        title: 'M',
        projects: ['马大同学', '马2同学', '马3同学', '马4同学', '马5同学', '马6同学']
      }
    ]
2、设置List组件
由于是分组展示,这里使用的是ListItemGroup组件。
List({ space: 10 }) {
        ForEach(this.listData, (item: ListData) => {
          ListItemGroup({ header: this.itemHead(item.title) }) {
            ForEach(item.projects, (project: string) => {
              ListItem() {
                Text(project)
                  .width('100%')
                  .height(50)
                  .fontSize(18)
                  .textAlign(TextAlign.Center)
              }
            }, (item: string) => item)
          }
          .divider({ strokeWidth: 1, color: "#f2f6f9" }) // 每行之间的分界线
        })
      }
      .width('100%')
      .height("100%")
      .sticky(StickyStyle.Header)
      .scrollBar(BarState.Off)
itemHead组件:
  @Builder
  itemHead(text: string) {
    Text(text)
      .fontSize(16)
      .backgroundColor("#f2f6f9")
      .width('100%')
      .height(40)
      .fontWeight(FontWeight.Bold)
      .padding({ left: 10 })
  }
四、实现字母和联系人列表联动
前边,我们基本上功能都已经实现了,目前就差一个联动,我们需要知道的是,联动是双向的,也就是说,滑动字母列表,左侧的信息列表也需要滚动,滑动信息列表,右侧的字母列表也需要针对性的改变样式。
1、设置scroller
这里我们通过scroller,来进行List组件定位,首先定义一个scroller。
private scroller: Scroller = new Scroller()
然后给左侧的信息列表设置:
List({ space: 10, scroller: this.scroller })
2、右侧联动
还是在之前的手势方法中,scroller进行定位。
   const scrollIndex = this.listData.findIndex(item => item.title === this.letterSelect)
    if (scrollIndex !== -1) {
      this.scroller.scrollToIndex(scrollIndex)
    }
3、左侧联动
左侧联动就比较简单了,无非就是监听左侧列表的滑动事件,然后根据索引进行改变右侧的样式。
    .onScrollIndex((start: number) => {
        let title = this.listData[start].title
        let latterPosition = this.letterList.indexOf(title)
        this.latterChange(latterPosition)
      })
五、源码
功能非常简单,所有代码如下:
import { HashMap } from '@kit.ArkTS'

interface ListData {
  title: string;
  projects: string[];
}

@Entry
@Component
struct Index {
  private letterList: string[] = []
  private letterPositionMap: HashMap<string, number> = new HashMap()
  @State textFontSizeArray: Length[] = []
  @State textFontColorArray: ResourceColor[] = []
  @State letterSelect: string | undefined = undefined //当前选中的字母
  private timeoutId: number = 0
  private scroller: Scroller = new Scroller()
  private listData: ListData[] = [
    {
      title: 'A',
      projects: ['安大同学', '安少同学', '安1同学', '安2同学', '安3同学']
    },
    {
      title: 'B',
      projects: ['包1同学', '包2同学', '包3同学', '包4同学', '包5同学', '包6同学', '包7同学', '包8同学', '包9同学']
    },
    {
      title: 'C',
      projects: ['蔡1同学', '蔡2同学', '蔡3同学', '蔡4同学', '蔡5同学', '蔡6同学', '蔡7同学', '蔡8同学', '蔡9同学']
    },
    {
      title: 'D',
      projects: ['杜1同学', '杜2同学', '杜3同学', '杜4同学', '杜5同学', '杜6同学']
    },
    {
      title: 'F',
      projects: ['范1同学', '范2同学', '范3同学', '范4同学', '范5同学', '范6同学', '范7同学']
    },
    {
      title: 'L',
      projects: ['李大同学', '李2同学', '李3同学', '李4同学', '李5同学', '李6同学']
    },
    {
      title: 'M',
      projects: ['马大同学', '马2同学', '马3同学', '马4同学', '马5同学', '马6同学']
    }
  ]

  aboutToAppear(): void {
    for (let i = 65; i <= 90; i++) {
      this.letterList.push(String.fromCharCode(i))
      this.textFontSizeArray.push(14)
      this.textFontColorArray.push("#666666")
    }
  }

  @Builder
  itemHead(text: string) {
    Text(text)
      .fontSize(16)
      .backgroundColor("#f2f6f9")
      .width('100%')
      .height(40)
      .fontWeight(FontWeight.Bold)
      .padding({ left: 10 })
  }

  build() {
    RelativeContainer() {

      List({ space: 10, scroller: this.scroller }) {
        ForEach(this.listData, (item: ListData) => {
          ListItemGroup({ header: this.itemHead(item.title) }) {
            ForEach(item.projects, (project: string) => {
              ListItem() {
                Text(project)
                  .width('100%')
                  .height(50)
                  .fontSize(18)
                  .textAlign(TextAlign.Center)
              }
            }, (item: string) => item)
          }
          .divider({ strokeWidth: 1, color: "#f2f6f9" })
        })
      }
      .width('100%')
      .height("100%")
      .sticky(StickyStyle.Header)
      .scrollBar(BarState.Off)
      .onScrollIndex((start: number) => {
        let title = this.listData[start].title
        let latterPosition = this.letterList.indexOf(title)
        this.latterChange(latterPosition)
      })


      List({ space: 5 }) {
        ForEach(this.letterList, (item: string, index: number) => {
          ListItem() {
            Text(item)
              .fontColor(this.textFontColorArray[index])
              .fontSize(this.textFontSizeArray[index])
          }.onAreaChange((_: Area, newValue: Area) => {
            this.letterPositionMap.set(item, Number(newValue.position.y) + Number(newValue.height))
          })
        })
      }
      .width(30)
      .backgroundColor("#f2f6f9")
      .margin({ right: 10 })
      .padding({ top: 10, bottom: 10 })
      .borderRadius(30)
      .alignListItem(ListItemAlign.Center)
      .alignRules({
        right: { anchor: "__container__", align: HorizontalAlign.End },
        center: { anchor: "__container__", align: VerticalAlign.Center },
      })
      .onTouch((event) => {
        switch (event.type) {
          case TouchType.Down: //手势按下
          case TouchType.Move: //手势抬起
            this.changeStatus(event.touches[0].y);
            break
          case TouchType.Up: //手势抬起
            clearTimeout(this.timeoutId)
            this.timeoutId = setTimeout(() => {
              this.letterSelect = undefined
            }, 500)
            break
        }
      })

      Text(this.letterSelect)
        .visibility(this.letterSelect == undefined ? Visibility.None : Visibility.Visible)
        .backgroundColor("#f2f6f9")
        .fontColor("#222222")
        .fontWeight(FontWeight.Bold)
        .fontSize(18)
        .textAlign(TextAlign.Center)
        .width(50)
        .height(50)
        .borderRadius(50)
        .alignRules({
          middle: { anchor: "__container__", align: HorizontalAlign.Center },
          center: { anchor: "__container__", align: VerticalAlign.Center },
        })

    }
    .width("100%")
    .height("100%")
  }

  changeStatus(moveY: number) {
    const positions = this.letterList.map(letter => this.letterPositionMap.get(letter))
    let index = 0
    for (let i = 0; i < positions.length; i++) {
      if (moveY < positions[i]) {
        break
      }
      index = i + 1
    }

    //index就是触摸的每个字母的索引

    this.letterSelect = this.letterList[index]

    const scrollIndex = this.listData.findIndex(item => item.title === this.letterSelect)
    if (scrollIndex !== -1) {
      this.scroller.scrollToIndex(scrollIndex)
    }

    this.latterChange(index)
  }

  latterChange(index: number) {
    this.textFontSizeArray.forEach((_, index) => {
      this.textFontSizeArray[index] = 14
      this.textFontColorArray[index] = "#666666"
    })
    this.textFontSizeArray[index] = 16
    this.textFontColorArray[index] = "#222222"
  }
}
六、相关总结
实现的方式并不是一成不变,你也可以通过Canvas自定义绘制来实现,基本上大同小异,都是必须要确认当前触摸字母的位置,然后进行样式的更改,左右列表的联动操作。