元服务登录页面搭建
2024-11-24 15:41:42
451次阅读
0个评论
登录页面搭建
代码如下
@Entry
@Component
struct LoginPage {
  @State userName:string = "";
  @State passWorld:string = "";
  build() {
    Column() {
      Row() {
        Text("账号:").fontSize(22).width('20%')
        TextInput({ placeholder: "请输入账号" ,text:this.userName}).fontSize(26)
          .onChange((EnterKeyType)=>{
            this.userName = EnterKeyType;
            console.info(EnterKeyType)
          }).width('80%')
      }
      Blank()
      Row() {
        Text("密码:").fontSize(22).width('20%')
        TextInput({ placeholder: "请输入密码" ,text:this.passWorld})
          .type(InputType.Password).fontSize(26)
          .onChange((EnterKeyType)=>{
            this.passWorld = EnterKeyType;
          }).width('80%')
      }
      Blank()
      Row(){
        Button("登录").width('80%').onClick(()=>{
          if(this.userName == "admin" && this.passWorld == "123456"){
            console.log("登录测试成功");
          }else{
            console.log("账号密码有误");
          }
        })
      }
    }.width('100%').height('30%')
    .justifyContent(FlexAlign.Center)
    .margin({top:100})
  }
}
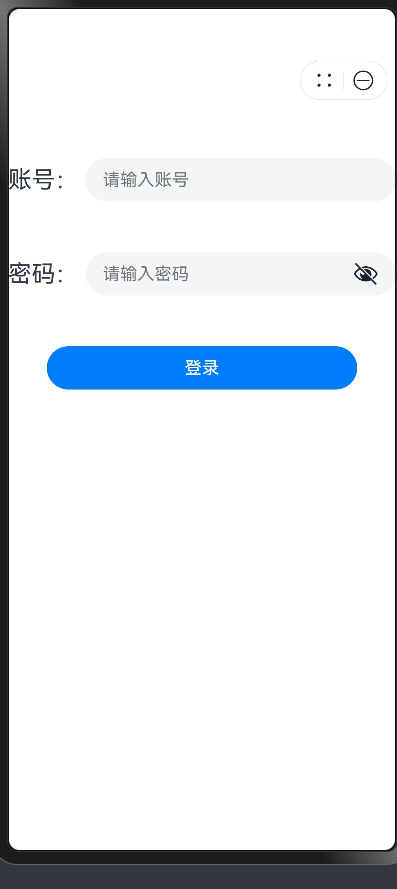
老规矩,还是基础的声明了,然后定义两个变量, 一个是账号一个是密码,一会将输入的数据赋值到这个变量里面
这里我们采用竖着布局,里面在来两个行即可input,文本命名为我们定义的账号变量,然后使用onchange函数,传一个形参,令形参等于我们定义的变量
然后我们大概对其调整一下样式即可
效果如下
00
