用Uniapp开发鸿蒙项目 八(下)
2025-06-24 15:28:55
359次阅读
0个评论
四、给表单添加网络请求提交数据
(一)准备测试提交接口
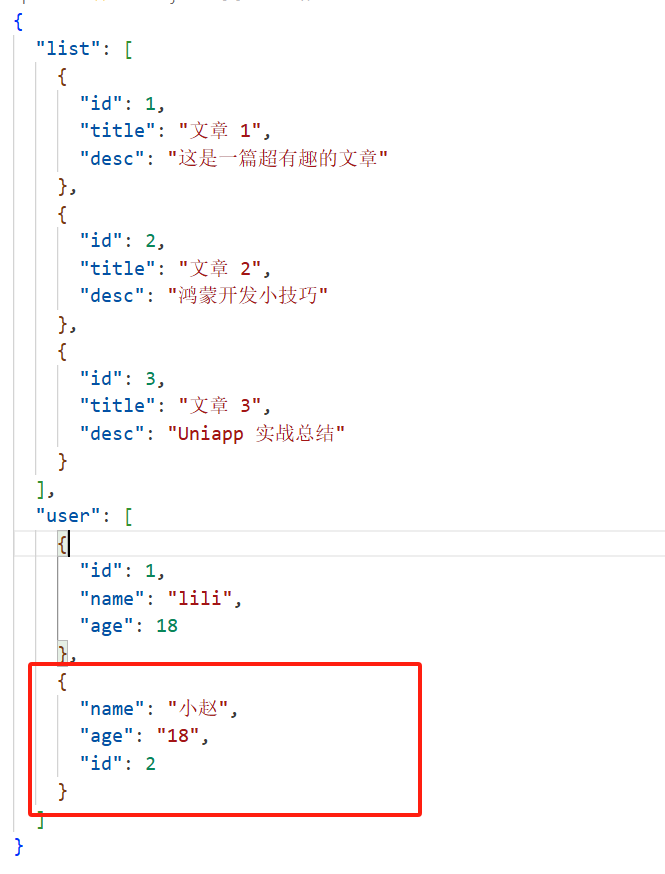
同上一篇文章一样先造一个接口(这个接口是模拟接收表单数据的,实际要根据真实接口调整)。图如下:
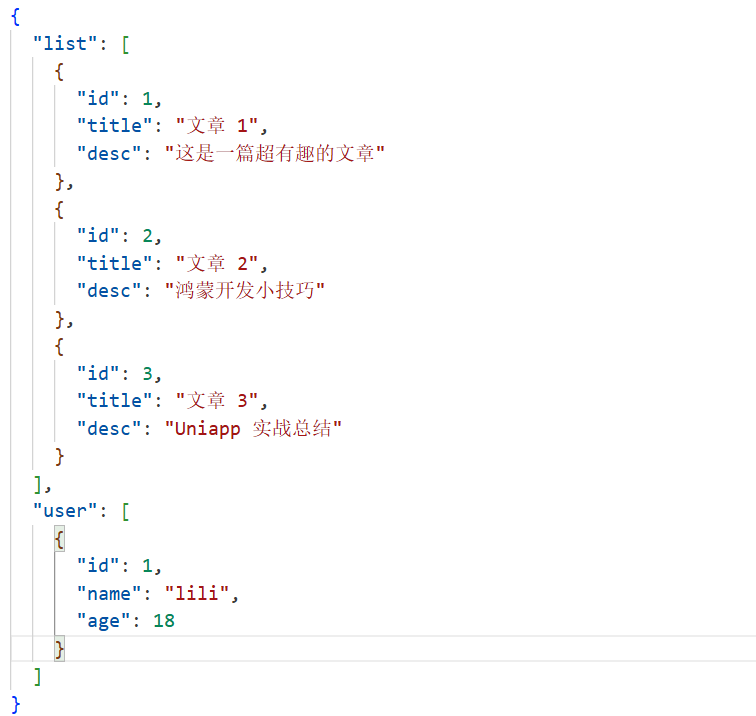
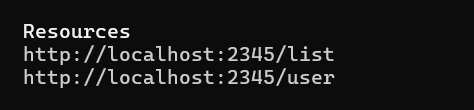
模拟接口链接为:
(二)修改首页表单代码
打开pages/index/index.uvue,修改submitForm方法,让表单数据通过网络请求提交:
<template>
  <view class="container">
    <text>这是首页呀</text>
    <!-- 跳转按钮 -->
    <button @click="goToUserPage">去个人页面</button>
    <!-- 表单区域 -->
    <view class="form-area">
      <view class="form-item">
        <text>姓名:</text>
        <input class="wh" type="text" placeholder="请输入姓名" v-model="formData.name" />
      </view>
      <view class="form-item">
        <text>年龄:</text>
        <input  class="wh" type="number" placeholder="请输入年龄" v-model="formData.age" />
      </view>
      <button class="submit-btn" @click="submitForm">提交</button>
    </view>
  </view>
</template>

<script>
export default {
  data() {
    return {
      formData: {
        name: '',
        age: ''
      }
    };
  },
  methods: {
    goToUserPage() {
      uni.navigateTo({
        url: '/pages/user/user'
      });
    },
    submitForm() {
      if (!this.formData.name || !this.formData.age) {
        uni.showToast({
          title: '请填写完整信息',
          icon: 'none'
        });
        return;
      }
      // 发起网络请求提交数据
      uni.request({
        url: 'http://10.0.2.2:2345/user',
        method: 'POST',
        data: this.formData,
        success: (res) => {
          if (res.statusCode === 201) {
            uni.showToast({
              title: '提交成功',
              icon: 'success'
            });
            // 提交成功后可以清空表单
            this.formData.name = '';
            this.formData.age = '';
          } else {
            uni.showToast({
              title: '提交失败,请重试',
              icon: 'none'
            });
          }
        },
        fail: (err) => {
          console.log('提交失败', err);
          uni.showToast({
            title: '网络出错啦',
            icon: 'none'
          });
        }
      });
    }
  }
}
</script>

<style>
.container {
  display: flex;
  flex-direction: column;
  align-items: center;
  justify-content: center;
  height: 100vh;
}
button {
  margin-top: 20rpx;
  padding: 15rpx 30rpx;
  background-color: #007AFF;
  color: #fff;
  border-radius: 8rpx;
}
.form-area {
  width: 80%;
  margin-top: 30rpx;
}
.form-item {
  display: flex;
  flex-direction: row;

  margin-bottom: 20rpx;
}
.form-item text {
  width: 120rpx;
}
.input {
  flex: 1;
  padding: 10rpx;
  border: 1px solid #ccc;
  border-radius: 4rpx;
}
.submit-btn {
  width: 100%;
}
.wh{
	width: 50%;
}
</style>
这里在表单提交时,先做校验,通过后用POST方法把formData的数据提交到接口,根据返回结果提示用户提交成功或失败,成功的话还可以清空表单数据。
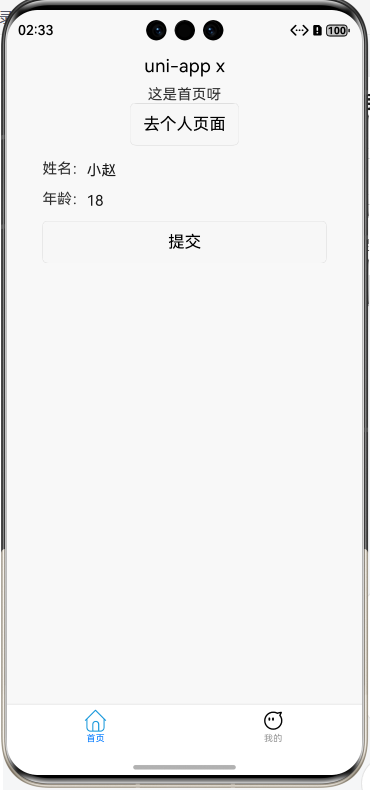
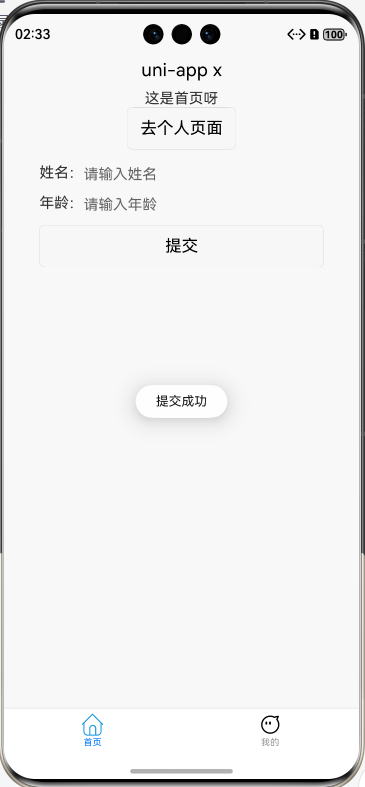
页面效果:

五、遇到的问题及解决
(一)跨域问题
在浏览器运行项目测试时,可能会遇到跨域报错。不过在真机或模拟器运行时,Uniapp 已经做了处理,一般不会有跨域问题。如果是在 HBuilderX 里用浏览器预览出现跨域,可以安装浏览器的跨域插件(比如 Chrome 的 Allow CORS 插件)临时解决,或者让后端小伙伴配置跨域头。
(二)接口返回数据格式不对
有时候接口返回的数据结构和我们预期的不一样,导致页面渲染出错。这时候要仔细看接口文档,或者打印res.data看看具体返回内容,调整代码里的数据处理逻辑。比如有的接口返回会包一层result,那我们就得取res.data.result里的数据。
六、总结
今天给项目加上了网络请求功能,让列表能从服务器获取数据,表单能把数据提交到服务器,这就更贴近真实项目啦!通过uni.request方法,我们可以很方便地实现数据的获取和提交,虽然过程中遇到了跨域、数据格式等小问题,但解决后对网络请求的理解更深了。后续打算优化网络请求的封装,比如把uni.request封装成一个通用函数,减少重复代码,还可以处理加载动画、统一错误提示等。学习就是这样,一步步把功能完善,慢慢构建出一个完整的应用,继续加油呀!
##Uniapp##三方框架##商务##
00