鸿蒙输入法开发指南【2】
2025-06-29 23:05:16
407次阅读
0个评论
第二篇:核心功能实现篇
概述
在掌握了鸿蒙输入法开发的基础架构后,本篇将深入探讨输入法应用的核心功能实现。包括软键盘窗口的创建与管理、文本输入处理、事件监听机制、以及输入法与应用之间的通信协议。通过详细的代码示例和实践指导,帮助开发者构建功能完整、性能优秀的输入法应用。 成品效果图如下: 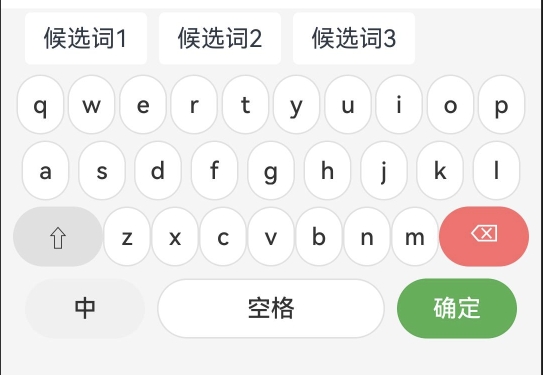
1. 软键盘窗口创建与管理
1.1 输入法面板创建
输入法面板是用户与输入法交互的主要界面,需要通过InputMethodExtensionAbility提供的API来创建和管理。面板的创建通常在输入法服务启动时进行,并且需要根据不同的输入场景动态调整。
import { inputMethodAbility, Panel, PanelInfo, PanelType } from '@kit.IMEKit';
import { window } from '@kit.ArkUI';

export default class KeyboardController {
  private inputMethodAbility: inputMethodAbility.InputMethodAbility;
  private keyboardPanel: Panel | undefined;

  constructor(inputMethodAbility: inputMethodAbility.InputMethodAbility) {
    this.inputMethodAbility = inputMethodAbility;
  }

  /**
   * 创建软键盘面板
   * 在输入法服务初始化时调用
   */
  async createKeyboardPanel(): Promise<void> {
    try {
      // 配置面板信息
      const panelInfo: PanelInfo = {
        type: PanelType.SOFT_KEYBOARD,  // 软键盘类型
        flag: window.WindowFlag.FLAG_SHOW_WHEN_LOCKED  // 锁屏时可显示
      };

      // 创建输入法面板
      this.keyboardPanel = await this.inputMethodAbility.createPanel(this.context, panelInfo);

      console.log('键盘面板创建成功');

      // 设置面板属性
      await this.setupPanelProperties();

      // 加载键盘界面
      await this.loadKeyboardUI();

    } catch (error) {
      console.error('创建键盘面板失败:', error);
      throw error;
    }
  }

  /**
   * 设置面板属性
   * 包括大小、位置、透明度等
   */
  private async setupPanelProperties(): Promise<void> {
    if (!this.keyboardPanel) {
      return;
    }

    try {
      // 设置面板大小
      await this.keyboardPanel.resize(720, 280);

      // 设置面板位置(底部对齐)
      await this.keyboardPanel.moveTo(0, 1000);

      // 设置面板可见性
      await this.keyboardPanel.setUiContent('pages/KeyboardPage');

      console.log('面板属性设置完成');
    } catch (error) {
      console.error('设置面板属性失败:', error);
    }
  }

  /**
   * 显示键盘面板
   * 当用户点击输入框时调用
   */
  async showKeyboard(): Promise<void> {
    if (!this.keyboardPanel) {
      await this.createKeyboardPanel();
    }

    try {
      await this.keyboardPanel?.show();
      console.log('键盘显示成功');
    } catch (error) {
      console.error('显示键盘失败:', error);
    }
  }

  /**
   * 隐藏键盘面板
   * 当用户完成输入或切换应用时调用
   */
  async hideKeyboard(): Promise<void> {
    try {
      await this.keyboardPanel?.hide();
      console.log('键盘隐藏成功');
    } catch (error) {
      console.error('隐藏键盘失败:', error);
    }
  }

  /**
   * 销毁键盘面板
   * 在输入法服务销毁时调用
   */
  async destroyKeyboard(): Promise<void> {
    try {
      if (this.keyboardPanel) {
        await this.inputMethodAbility.destroyPanel(this.keyboardPanel);
        this.keyboardPanel = undefined;
        console.log('键盘面板销毁成功');
      }
    } catch (error) {
      console.error('销毁键盘面板失败:', error);
    }
  }
}
1.2 键盘界面设计
键盘界面通常使用ArkUI组件进行构建,需要考虑不同屏幕尺寸的适配和用户体验的优化。
// KeyboardPage.ets - 键盘界面页面
@Entry
@Component
struct KeyboardPage {
  @State currentInputMode: string = 'zh';  // 当前输入模式
  @State isShiftPressed: boolean = false;  // Shift键状态
  @State keyboardHeight: number = 280;     // 键盘高度

  build() {
    Column() {
      // 候选词区域
      this.CandidateArea()

      // 主键盘区域
      this.MainKeyboardArea()

      // 功能键区域
      this.FunctionKeyArea()
    }
    .width('100%')
    .height(this.keyboardHeight)
    .backgroundColor('#f5f5f5')
  }

  /**
   * 候选词显示区域
   */
  @Builder
  CandidateArea() {
    Row() {
      ForEach(this.getCandidates(), (candidate: string, index: number) => {
        Text(candidate)
          .fontSize(16)
          .padding({ left: 12, right: 12, top: 8, bottom: 8 })
          .backgroundColor(Color.White)
          .borderRadius(4)
          .margin({ right: 8 })
          .onClick(() => {
            this.selectCandidate(candidate);
          })
      })
    }
    .width('100%')
    .height(40)
    .padding({ left: 16, right: 16 })
    .justifyContent(FlexAlign.Start)
  }

  /**
   * 主键盘区域
   */
  @Builder
  MainKeyboardArea() {
    Column() {
      // 第一行按键
      this.KeyRow(['Q', 'W', 'E', 'R', 'T', 'Y', 'U', 'I', 'O', 'P'])

      // 第二行按键
      this.KeyRow(['A', 'S', 'D', 'F', 'G', 'H', 'J', 'K', 'L'])

      // 第三行按键
      Row() {
        // Shift键
        Button('⇧')
          .width(60)
          .height(40)
          .fontSize(16)
          .fontColor(this.isShiftPressed ? '#ffffff' : '#333333')  // 根据状态设置字体颜色
          .backgroundColor(this.isShiftPressed ? '#4CAF50' : '#e0e0e0')
          .borderRadius(4)
          .onClick(() => {
            this.toggleShift();
          })

        // 字母键
        ForEach(['Z', 'X', 'C', 'V', 'B', 'N', 'M'], (key: string) => {
          this.KeyButton(key)
        })

        // 删除键
        Button('⌫')
          .width(60)
          .height(40)
          .fontSize(16)
          .fontColor('#ffffff')  // 白色字体在红色背景上
          .backgroundColor('#ff6b6b')
          .borderRadius(4)
          .onClick(() => {
            this.deleteText();
          })
      }
      .width('100%')
      .justifyContent(FlexAlign.SpaceEvenly)
      .margin({ top: 4 })
    }
    .width('100%')
    .padding({ left: 8, right: 8 })
  }

  /**
   * 功能键区域
   */
  @Builder
  FunctionKeyArea() {
    Row() {
      // 输入模式切换
      Button(this.currentInputMode === 'zh' ? '中' : 'EN')
        .width(80)
        .height(40)
        .fontSize(16)
        .fontColor('#333333')  // 深灰色字体
        .backgroundColor('#f0f0f0')
        .borderRadius(4)
        .onClick(() => {
          this.switchInputMode();
        })

      // 空格键
      Button('空格')
        .layoutWeight(1)
        .height(40)
        .fontSize(16)
        .fontColor('#333333')  // 深灰色字体
        .backgroundColor('#ffffff')
        .border({ width: 1, color: '#e0e0e0' })
        .borderRadius(4)
        .margin({ left: 8, right: 8 })
        .onClick(() => {
          this.insertText(' ');
        })

      // 回车键
      Button('确定')
        .width(80)
        .height(40)
        .fontSize(16)
        .fontColor('#ffffff')  // 白色字体在绿色背景上
        .backgroundColor('#4CAF50')
        .borderRadius(4)
        .onClick(() => {
          this.commitText();
        })
    }
    .width('100%')
    .padding({ left: 16, right: 16, top: 8 })
  }

  /**
   * 按键行构建器
   */
  @Builder
  KeyRow(keys: string[]) {
    Row() {
      ForEach(keys, (key: string) => {
        this.KeyButton(key)
      })
    }
    .width('100%')
    .justifyContent(FlexAlign.SpaceEvenly)
    .margin({ top: 4 })
  }

  /**
   * 单个按键构建器
   */
  @Builder
  KeyButton(key: string) {
    Button(this.isShiftPressed ? key.toUpperCase() : key.toLowerCase())
      .width(32)
      .height(40)
      .fontSize(16)
      .fontColor('#333333')  // 设置字体颜色为深灰色
      .backgroundColor('#ffffff')
      .border({ width: 1, color: '#e0e0e0' })
      .borderRadius(4)  // 添加圆角
      .onClick(() => {
        this.handleKeyPress(key);
      })
      .padding(0)
  }

  /**
   * 获取候选词列表
   */
  private getCandidates(): string[] {
    // 这里应该根据当前输入内容返回候选词
    // 实际实现中需要调用输入法引擎
    return ['候选词1', '候选词2', '候选词3'];
  }

  /**
   * 处理按键点击
   */
  private handleKeyPress(key: string): void {
    const actualKey = this.isShiftPressed ? key.toUpperCase() : key.toLowerCase();

    if (this.currentInputMode === 'zh') {
      // 中文输入模式
      this.processPinyinInput(actualKey);
    } else {
      // 英文输入模式
      this.insertText(actualKey);
    }
  }

  /**
   * 处理拼音输入
   */
  private processPinyinInput(key: string): void {
    // 拼音输入处理逻辑
    // 实际实现中需要调用拼音引擎
    console.log('拼音输入:', key);
  }

  /**
   * 插入文本到输入框
   */
  private insertText(text: string): void {
    // 通过输入法框架向目标应用发送文本
    // 实际实现中需要调用InputMethodAbility的相关API
    console.log('插入文本:', text);
  }

  /**
   * 删除文本
   */
  private deleteText(): void {
    // 删除光标前的字符
    console.log('删除文本');
  }

  /**
   * 选择候选词
   */
  private selectCandidate(candidate: string): void {
    this.insertText(candidate);
    // 清空当前输入的拼音
  }

  /**
   * 切换输入模式
   */
  private switchInputMode(): void {
    this.currentInputMode = this.currentInputMode === 'zh' ? 'en' : 'zh';
  }

  /**
   * 切换Shift状态
   */
  private toggleShift(): void {
    this.isShiftPressed = !this.isShiftPressed;
  }

  /**
   * 确认输入
   */
  private commitText(): void {
    // 提交当前输入内容并隐藏键盘
    console.log('确认输入');
  }
}
2. 文本输入处理
2.1 文本操作API
鸿蒙输入法框架提供了丰富的文本操作API,用于实现文本的插入、删除、选择等操作。
import { inputMethodAbility, TextInputClient } from '@kit.IMEKit';

export class TextInputHandler {
  private inputClient: TextInputClient | undefined;

  /**
   * 获取输入客户端
   * 在输入开始时调用
   */
  async getInputClient(): Promise<void> {
    try {
      this.inputClient = inputMethodAbility.getCurrentInputMethodAbility()?.getInputMethodAgent()?.getTextInputClient();
      console.log('获取输入客户端成功');
    } catch (error) {
      console.error('获取输入客户端失败:', error);
    }
  }

  /**
   * 插入文本
   * @param text 要插入的文本内容
   */
  async insertText(text: string): Promise<void> {
    if (!this.inputClient) {
      console.error('输入客户端未初始化');
      return;
    }

    try {
      await this.inputClient.insertText(text);
      console.log('插入文本成功:', text);
    } catch (error) {
      console.error('插入文本失败:', error);
    }
  }

  /**
   * 删除文本
   * @param length 要删除的字符数量
   */
  async deleteForward(length: number): Promise<void> {
    if (!this.inputClient) {
      return;
    }

    try {
      await this.inputClient.deleteForward(length);
      console.log('向前删除文本成功,长度:', length);
    } catch (error) {
      console.error('删除文本失败:', error);
    }
  }

  /**
   * 向后删除文本
   * @param length 要删除的字符数量
   */
  async deleteBackward(length: number): Promise<void> {
    if (!this.inputClient) {
      return;
    }

    try {
      await this.inputClient.deleteBackward(length);
      console.log('向后删除文本成功,长度:', length);
    } catch (error) {
      console.error('删除文本失败:', error);
    }
  }

  /**
   * 获取光标前的文本
   * @param length 获取的字符数量
   */
  async getForward(length: number): Promise<string> {
    if (!this.inputClient) {
      return '';
    }

    try {
      const text = await this.inputClient.getForward(length);
      console.log('获取光标前文本:', text);
      return text;
    } catch (error) {
      console.error('获取文本失败:', error);
      return '';
    }
  }

  /**
   * 获取光标后的文本
   * @param length 获取的字符数量
   */
  async getBackward(length: number): Promise<string> {
    if (!this.inputClient) {
      return '';
    }

    try {
      const text = await this.inputClient.getBackward(length);
      console.log('获取光标后文本:', text);
      return text;
    } catch (error) {
      console.error('获取文本失败:', error);
      return '';
    }
  }

  /**
   * 选择文本
   * @param startIndex 选择开始位置
   * @param endIndex 选择结束位置
   */
  async selectByRange(startIndex: number, endIndex: number): Promise<void> {
    if (!this.inputClient) {
      return;
    }

    try {
      await this.inputClient.selectByRange(startIndex, endIndex);
      console.log('选择文本成功,范围:', startIndex, '-', endIndex);
    } catch (error) {
      console.error('选择文本失败:', error);
    }
  }

  /**
   * 选择所有文本
   */
  async selectAll(): Promise<void> {
    if (!this.inputClient) {
      return;
    }

    try {
      await this.inputClient.selectAll();
      console.log('选择所有文本成功');
    } catch (error) {
      console.error('选择所有文本失败:', error);
    }
  }
}
3. 事件监听与处理
3.1 输入法事件监听
输入法需要监听各种系统事件,包括输入开始、输入结束、键盘显示/隐藏等事件。
import { inputMethodAbility, InputMethodAbility } from '@kit.IMEKit';

export class InputEventManager {
  private inputMethodAbility: InputMethodAbility;
  private keyboardController: KeyboardController;
  private textInputHandler: TextInputHandler;

  constructor(inputMethodAbility: InputMethodAbility) {
    this.inputMethodAbility = inputMethodAbility;
    this.keyboardController = new KeyboardController(inputMethodAbility);
    this.textInputHandler = new TextInputHandler();
  }

  /**
   * 注册所有事件监听器
   */
  registerEventListeners(): void {
    // 监听输入开始事件
    this.inputMethodAbility.on('inputStart', (kbController, textInputClient) => {
      this.onInputStart(kbController, textInputClient);
    });

    // 监听输入结束事件
    this.inputMethodAbility.on('inputStop', (imeId) => {
      this.onInputStop(imeId);
    });

    // 监听键盘显示事件
    this.inputMethodAbility.on('setCallingWindow', (wid) => {
      this.onKeyboardShow(wid);
    });

    // 监听键盘隐藏事件
    this.inputMethodAbility.on('setSubtype', (property) => {
      this.onKeyboardHide(property);
    });

    console.log('事件监听器注册完成');
  }

  /**
   * 注销所有事件监听器
   */
  unregisterEventListeners(): void {
    try {
      this.inputMethodAbility.off('inputStart');
      this.inputMethodAbility.off('inputStop');
      this.inputMethodAbility.off('setCallingWindow');
      this.inputMethodAbility.off('setSubtype');

      console.log('事件监听器注销完成');
    } catch (error) {
      console.error('注销事件监听器失败:', error);
    }
  }

  /**
   * 处理输入开始事件
   * @param kbController 键盘控制器
   * @param textInputClient 文本输入客户端
   */
  private async onInputStart(kbController: any, textInputClient: any): Promise<void> {
    console.log('输入开始事件触发');

    try {
      // 初始化文本输入处理器
      await this.textInputHandler.getInputClient();

      // 显示键盘
      await this.keyboardController.showKeyboard();

      // 获取输入框的上下文信息
      this.getInputContext();

    } catch (error) {
      console.error('处理输入开始事件失败:', error);
    }
  }

  /**
   * 处理输入结束事件
   * @param imeId 输入法ID
   */
  private async onInputStop(imeId: string): Promise<void> {
    console.log('输入结束事件触发, IME ID:', imeId);

    try {
      // 隐藏键盘
      await this.keyboardController.hideKeyboard();

      // 清理输入状态
      this.clearInputState();

    } catch (error) {
      console.error('处理输入结束事件失败:', error);
    }
  }

  /**
   * 处理键盘显示事件
   * @param wid 窗口ID
   */
  private onKeyboardShow(wid: number): void {
    console.log('键盘显示事件触发, 窗口ID:', wid);

    // 调整键盘位置和大小
    this.adjustKeyboardLayout();
  }

  /**
   * 处理键盘隐藏事件
   * @param property 属性信息
   */
  private onKeyboardHide(property: any): void {
    console.log('键盘隐藏事件触发');

    // 保存用户输入状态
    this.saveInputState();
  }

  /**
   * 获取输入上下文信息
   */
  private getInputContext(): void {
    // 获取当前输入框的类型、属性等信息
    // 用于调整输入法的行为和界面
    console.log('获取输入上下文信息');
  }

  /**
   * 清理输入状态
   */
  private clearInputState(): void {
    // 清理当前的输入状态,如拼音缓冲区、候选词等
    console.log('清理输入状态');
  }

  /**
   * 调整键盘布局
   */
  private adjustKeyboardLayout(): void {
    // 根据屏幕方向、应用类型等调整键盘布局
    console.log('调整键盘布局');
  }

  /**
   * 保存输入状态
   */
  private saveInputState(): void {
    // 保存用户的输入偏好、词频等信息
    console.log('保存输入状态');
  }
}
通过本篇的学习,开发者已经掌握了鸿蒙输入法开发的核心功能实现方法,包括软键盘创建、文本处理、事件监听等关键技术。这些技术为构建功能完整的输入法应用提供了坚实的基础。
00
