153.[HarmonyOS NEXT 实战案例十一 :List系列] 自定义内容列表 - 基础篇
[HarmonyOS NEXT 实战案例十一 :List系列] 自定义内容列表 - 基础篇
项目已开源,开源地址: https://gitcode.com/nutpi/HarmonyosNextCaseStudyTutorial , 欢迎fork & star
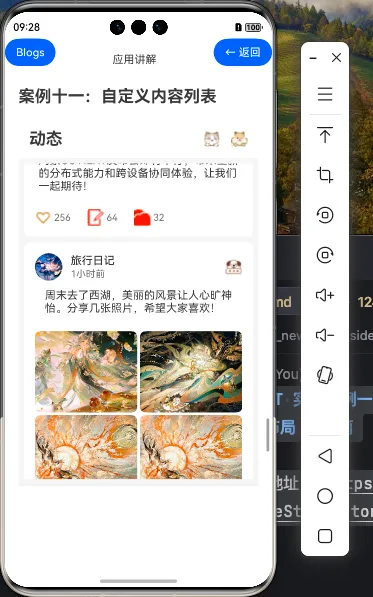
效果演示

1. 概述
在移动应用开发中,社交媒体类应用的动态列表是一个非常常见且重要的UI组件。这类列表需要展示多种类型的内容,如纯文本、图片、视频、链接等,并且每种内容类型都有其独特的展示方式。本教程将介绍如何使用HarmonyOS NEXT的ArkUI框架实现一个功能丰富的自定义内容列表,适用于社交媒体应用的动态展示。
1.1 应用场景
- 社交媒体应用的动态流(Feed)
- 新闻聚合应用的文章列表
- 博客平台的文章预览
- 内容分享平台的内容展示
2. 核心组件介绍
在实现自定义内容列表时,我们将使用以下HarmonyOS NEXT的核心组件:
- List & ListItem:用于创建垂直滚动列表和列表项
- Row & Column:用于布局排列
- Image:用于显示图片内容
- Text:用于显示文本内容
- Grid & GridItem:用于网格布局,展示多张图片
- Stack:用于叠加布局,如在视频上显示播放按钮
- ForEach:用于循环渲染列表项
3. 数据模型设计
在开始实现UI之前,我们需要设计合适的数据模型来表示不同类型的内容。
3.1 用户信息模型
interface User {
    name: string;        // 用户名
    avatar: Resource;    // 头像
    isVerified?: boolean; // 是否认证用户
}
3.2 链接信息模型
interface Link {
    title: string;       // 链接标题
    description: string; // 链接描述
    image: Resource;     // 链接预览图
    url: string;         // 链接URL
}
3.3 动态内容模型
interface Post {
    id: number;          // 动态ID
    user: User;          // 发布用户
    time: string;        // 发布时间
    content: string;     // 文本内容
    contentType: 'text' | 'image' | 'video' | 'link'; // 内容类型
    media?: Resource | Resource[]; // 媒体内容(图片或视频)
    link?: Link;         // 链接内容
    likes: number;       // 点赞数
    comments: number;    // 评论数
    shares: number;      // 分享数
    isLiked: boolean;    // 当前用户是否点赞
}
4. 实现步骤
4.1 创建组件结构
首先,我们创建自定义内容列表组件的基本结构:
@Component
export struct CustomContentList {
    // 动态数据
    private posts: Post[] = [...] // 初始化数据

    // 点赞操作
    toggleLike(id: number) {
        // 实现点赞逻辑
    }

    build() {
        Column() {
            // 标题栏
            // 动态列表
            // 底部导航栏
        }
        .width('100%')
        .height('100%')
    }
}
4.2 实现不同类型内容的构建器
为了处理不同类型的内容,我们使用@Builder装饰器创建专用的构建函数:
4.2.1 文本内容构建器
@Builder
TextContent(content: string) {
    Text(content)
        .fontSize(16)
        .margin({ top: 12, bottom: 12 })
}
4.2.2 图片内容构建器
图片内容构建器需要处理不同数量的图片,并采用不同的布局方式:
@Builder
ImageContent(images: Resource[]) {
    if (images.length === 1) {
        // 单张图片布局
        Image(images[0])
            .width('100%')
            .height(240)
            .objectFit(ImageFit.Cover)
            .borderRadius(8)
            .margin({ top: 12, bottom: 12 })
    } else if (images.length === 2) {
        // 两张图片布局
        Row({ space: 4 }) {
            ForEach(images, (image:Resource) => {
                Image(image)
                    .width('50%')
                    .height(180)
                    .objectFit(ImageFit.Cover)
                    .borderRadius(8)
            })
        }
        .width('100%')
        .margin({ top: 12, bottom: 12 })
    } else if (images.length === 3) {
        // 三张图片布局
        // 一张大图上面,两张小图下面
    } else {
        // 四张及以上图片布局
        // 使用Grid组件,并在第四张上显示更多数量
    }
}
4.2.3 视频内容构建器
@Builder
VideoContent(video: Resource) {
    Stack({ alignContent: Alignment.Center }) {
        Image(video) // 实际应用中这里应该是Video组件
            .width('100%')
            .height(240)
            .objectFit(ImageFit.Cover)
            .borderRadius(8)

        // 播放按钮
        Image($r('app.media.01'))
            .width(60)
            .height(60)
    }
    .margin({ top: 12, bottom: 12 })
}
4.2.4 链接内容构建器
@Builder
LinkContent(link: Link) {
    Row() {
        Column() {
            Text(link.title)
                .fontSize(16)
                .fontWeight(FontWeight.Medium)
                .maxLines(2)
                .textOverflow({ overflow: TextOverflow.Ellipsis })

            Text(link.description)
                .fontSize(14)
                .fontColor('#666666')
                .maxLines(2)
                .textOverflow({ overflow: TextOverflow.Ellipsis })
                .margin({ top: 4 })

            Text(link.url)
                .fontSize(14)
                .fontColor('#007DFF')
                .maxLines(1)
                .textOverflow({ overflow: TextOverflow.Ellipsis })
                .margin({ top: 4 })
        }
        .alignItems(HorizontalAlign.Start)
        .layoutWeight(2)

        Image(link.image)
            .width(80)
            .height(80)
            .objectFit(ImageFit.Cover)
            .borderRadius(8)
            .margin({ left: 12 })
            .layoutWeight(1)
    }
    .width('100%')
    .padding(12)
    .borderRadius(8)
    .backgroundColor('#F5F5F5')
    .margin({ top: 12, bottom: 12 })
}
4.3 实现标题栏
// 标题栏
Row() {
    Text('动态')
        .fontSize(24)
        .fontWeight(FontWeight.Bold)

    Blank()

    Image($r('app.media.02'))
        .width(24)
        .height(24)
        .margin({ right: 16 })

    Image($r('app.media.03'))
        .width(24)
        .height(24)
}
.width('100%')
.height(56)
.padding({ left: 16, right: 16 })
.backgroundColor('#FFFFFF')
4.4 实现动态列表
// 动态列表
List() {
    ForEach(this.posts, (post:Post) => {
        ListItem() {
            Column() {
                // 用户信息和时间
                Row() {
                    // 头像
                    Image(post.user.avatar)
                        .width(40)
                        .height(40)
                        .borderRadius(20)

                    // 用户名和时间
                    Column() {
                        Row() {
                            Text(post.user.name)
                                .fontSize(16)
                                .fontWeight(FontWeight.Medium)

                            if (post.user.isVerified) {
                                Image($r('app.media.04'))
                                    .width(16)
                                    .height(16)
                                    .margin({ left: 4 })
                            }
                        }

                        Text(post.time)
                            .fontSize(14)
                            .fontColor('#666666')
                            .margin({ top: 2 })
                    }
                    .alignItems(HorizontalAlign.Start)
                    .margin({ left: 12 })

                    Blank()

                    // 更多按钮
                    Image($r('app.media.05'))
                        .width(24)
                        .height(24)
                }
                .width('100%')

                // 文本内容
                this.TextContent(post.content)

                // 根据内容类型显示不同的内容
                if (post.contentType === 'image' && post.media) {
                    this.ImageContent(post.media as Resource[])
                } else if (post.contentType === 'video' && post.media) {
                    this.VideoContent(post.media as Resource)
                } else if (post.contentType === 'link' && post.link) {
                    this.LinkContent(post.link)
                }

                // 互动按钮
                Row() {
                    // 点赞按钮
                    Row() {
                        Image(post.isLiked ? $r('app.media.heart_filled') : $r('app.media.heart_outline'))
                            .width(24)
                            .height(24)

                        Text(post.likes.toString())
                            .fontSize(14)
                            .fontColor(post.isLiked ? '#FF5722' : '#666666')
                            .margin({ left: 4 })
                    }
                    .onClick(() => this.toggleLike(post.id))

                    // 评论按钮
                    Row() {
                        Image($r('app.media.note_icon'))
                            .width(24)
                            .height(24)

                        Text(post.comments.toString())
                            .fontSize(14)
                            .fontColor('#666666')
                            .margin({ left: 4 })
                    }
                    .margin({ left: 24 })

                    // 分享按钮
                    Row() {
                        Image($r('app.media.active_weather_icon'))
                            .width(24)
                            .height(24)

                        Text(post.shares.toString())
                            .fontSize(14)
                            .fontColor('#666666')
                            .margin({ left: 4 })
                    }
                    .margin({ left: 24 })
                }
                .width('100%')
                .margin({ top: 12 })
            }
            .width('100%')
            .padding(16)
            .backgroundColor('#FFFFFF')
            .borderRadius(8)
        }
        .margin({ bottom: 8 })
    })
}
.width('100%')
.layoutWeight(1)
.padding(8)
.backgroundColor('#F5F5F5')
4.5 实现底部导航栏
// 底部导航栏
Row() {
    Column() {
        Image($r('app.media.01'))
            .width(24)
            .height(24)
        Text('首页')
            .fontSize(12)
            .fontColor('#FF5722')
            .margin({ top: 4 })
    }
    .layoutWeight(1)

    Column() {
        Image($r('app.media.02'))
            .width(24)
            .height(24)
        Text('发现')
            .fontSize(12)
            .fontColor('#666666')
            .margin({ top: 4 })
    }
    .layoutWeight(1)

    Column() {
        Image($r('app.media.03'))
            .width(24)
            .height(24)
        Text('通知')
            .fontSize(12)
            .fontColor('#666666')
            .margin({ top: 4 })
    }
    .layoutWeight(1)

    Column() {
        Image($r('app.media.04'))
            .width(24)
            .height(24)
        Text('我的')
            .fontSize(12)
            .fontColor('#666666')
            .margin({ top: 4 })
    }
    .layoutWeight(1)
}
.width('100%')
.height(60)
.padding({ top: 8, bottom: 8 })
.backgroundColor('#FFFFFF')
.borderColor('#E5E5E5')
.borderWidth({ top: 1 })
4.6 实现点赞功能
// 点赞操作
toggleLike(id: number) {
    this.posts = this.posts.map(post => {
        if (post.id === id) {
            const isLiked = !post.isLiked
            post.isLiked = isLiked
            post.likes = isLiked ? post.likes + 1 : post.likes - 1
        }
        return post
    })
}
5. 技术要点分析
5.1 内容类型的条件渲染
在我们的实现中,使用了条件渲染来根据内容类型显示不同的UI:
// 根据内容类型显示不同的内容
if (post.contentType === 'image' && post.media) {
    this.ImageContent(post.media as Resource[])
} else if (post.contentType === 'video' && post.media) {
    this.VideoContent(post.media as Resource)
} else if (post.contentType === 'link' && post.link) {
    this.LinkContent(post.link)
}
这种方式使得我们可以在同一个列表中展示不同类型的内容,提高了UI的灵活性和丰富性。
5.2 图片布局的自适应处理
针对不同数量的图片,我们采用了不同的布局策略:
- 单张图片:全宽显示
- 两张图片:横向排列,各占50%宽度
- 三张图片:一张大图上面,两张小图下面
- 四张及以上图片:使用Grid网格布局,并在第四张上显示更多数量
这种自适应的布局方式可以更好地展示不同数量的图片,提升用户体验。
5.3 使用Builder装饰器提高代码复用性
通过@Builder装饰器,我们创建了多个UI构建函数,使得代码更加模块化和可复用:
@Builder
TextContent(content: string) {
    // 实现文本内容UI
}

@Builder
ImageContent(images: Resource[]) {
    // 实现图片内容UI
}

// 其他构建器...
这种方式使得代码结构更加清晰,也便于维护和扩展。
5.4 状态管理与交互
在点赞功能的实现中,我们通过更新数据模型来反映UI状态的变化:
toggleLike(id: number) {
    this.posts = this.posts.map(post => {
        if (post.id === id) {
            const isLiked = !post.isLiked
            post.isLiked = isLiked
            post.likes = isLiked ? post.likes + 1 : post.likes - 1
        }
        return post
    })
}
这种方式确保了数据和UI的一致性,提供了良好的用户交互体验。
6. 常见问题与解决方案
6.1 图片加载性能问题
问题:在列表中加载大量图片可能导致性能问题和内存占用过高。
解决方案:
- 使用懒加载技术,只在图片进入视口时才加载
- 使用适当的图片尺寸,避免加载过大的图片
- 考虑使用图片缓存机制
6.2 列表滚动性能问题
问题:当列表项较多且复杂时,可能导致滚动卡顿。
解决方案:
- 使用
LazyForEach替代ForEach,实现虚拟列表 - 简化列表项的复杂度,减少嵌套层级
- 避免在列表项中进行复杂计算
6.3 不同设备屏幕适配问题
问题:在不同尺寸的设备上,布局可能不一致。
解决方案:
- 使用相对单位(如百分比)而非固定像素
- 使用响应式布局,根据屏幕尺寸调整UI
- 针对不同设备类型提供不同的布局方案
7. 总结与扩展
在本教程中,我们学习了如何使用HarmonyOS NEXT的ArkUI框架实现一个功能丰富的自定义内容列表,适用于社交媒体应用的动态展示。我们设计了合适的数据模型,实现了不同类型内容的展示,并添加了交互功能。
