「Mac畅玩鸿蒙与硬件35」UI互动应用篇12 - 简易日历
2024-11-28 21:12:11
564次阅读
0个评论
最后修改时间:2024-12-22 22:25:19
本篇将带你实现一个简易日历应用,显示当前月份的日期,并支持选择特定日期的功能。用户可以通过点击日期高亮选中,还可以切换上下月份,体验动态界面的交互效果。

关键词
- UI互动应用
- 简易日历
- 动态界面
- 状态管理
- 用户交互
一、功能说明
简易日历应用提供了以下功能:
- 查看当前月份的日期。
- 点击某一天后高亮显示选中的日期。
- 支持切换到上一个或下一个月份。
用户通过动态界面交互,实时查看和选择日期,提升应用的互动体验。
二、所需组件
@Entry和@Component装饰器Column和Row布局组件,用于页面和网格布局Button组件,用于切换月份和选择日期Text组件,用于显示标题和选中的日期@State修饰符,用于管理界面动态更新的状态
三、项目结构
- 项目名称:
SimpleCalendarApp - 自定义组件名称:
SimpleCalendarPage - 代码文件:
SimpleCalendarPage.ets:实现核心逻辑。Index.ets:作为应用入口调用主页面组件。
四、代码实现
// 文件名:SimpleCalendarPage.ets

@Component
export struct SimpleCalendarPage {
  @State currentDate: Date = new Date(); // 当前日期
  @State selectedDate: Date | null = null; // 选中的日期

  build() {
    Column({ space: 20 }) {
      // 显示当前年份和月份
      Row({ space: 10 }) {
        Button('上一个月')
          .onClick(() => this.changeMonth(-1));

        Text(`${this.currentDate.getFullYear()}年 ${this.currentDate.getMonth() + 1}月`)
          .fontSize(24)
          .fontWeight(FontWeight.Bold)
          .alignSelf(ItemAlign.Center);

        Button('下一个月')
          .onClick(() => this.changeMonth(1));
      }
      .justifyContent(FlexAlign.SpaceBetween);

      // 显示星期标题
      Row({ space: 5 }) {
        ForEach(['日', '一', '二', '三', '四', '五', '六'], (day: string) => {
          Text(day)
            .fontSize(18)
            .fontWeight(FontWeight.Bold)
            .width('12%')
            .textAlign(TextAlign.Center);
        });
      }

      // 显示日期
      Column({ space: 5 }) {
        ForEach(this.getDatesInMonth(), (week: (Date | null)[]) => {
          Row({ space: 10 }) {
            ForEach(week, (date: Date | null) => {
              if (date) {
                Button(date.getDate().toString())
                  .backgroundColor(
                    this.selectedDate && this.isSameDay(this.selectedDate, date)
                      ? Color.Blue
                      : Color.Gray
                  )
                  .fontColor(Color.White)
                  .onClick(() => this.selectedDate = date)
                  .width('12%')
                  .height('50px');
              } else {
                Text(' ')// 空白占位
                  .width('12%')
                  .height('50px');
              }
            });
          }
          .justifyContent(FlexAlign.SpaceBetween);
        });
      }

      // 显示选中日期
      if (this.selectedDate) {
        Text(`选中的日期:${this.selectedDate.toLocaleDateString()}`)
          .fontSize(20)
          .alignSelf(ItemAlign.Center);
      }
    }
    .padding(20)
    .width('100%')
    .height('100%')
    .alignItems(HorizontalAlign.Center);
  }

  // 获取当月的所有日期,按星期分组
  private getDatesInMonth(): (Date | null)[][] {
    const year = this.currentDate.getFullYear();
    const month = this.currentDate.getMonth();
    const firstDay = new Date(year, month, 1).getDay();
    const lastDay = new Date(year, month + 1, 0).getDate();

    const weeks: (Date | null)[][] = [];
    let currentWeek: (Date | null)[] = Array(firstDay).fill(null);

    for (let day = 1; day <= lastDay; day++) {
      currentWeek.push(new Date(year, month, day));
      if (currentWeek.length === 7) {
        weeks.push(currentWeek);
        currentWeek = [];
      }
    }

    if (currentWeek.length > 0) {
      while (currentWeek.length < 7) {
        currentWeek.push(null);
      }
      weeks.push(currentWeek);
    }

    return weeks;
  }

  // 判断两个日期是否为同一天
  private isSameDay(date1: Date, date2: Date): boolean {
    return (
      date1.getFullYear() === date2.getFullYear() &&
        date1.getMonth() === date2.getMonth() &&
        date1.getDate() === date2.getDate()
    );
  }

  // 切换月份
  private changeMonth(offset: number) {
    const newDate = new Date(this.currentDate);
    newDate.setMonth(this.currentDate.getMonth() + offset);
    this.currentDate = newDate;
    this.selectedDate = null; // 切换月份时清除选中状态
  }
}
// 文件名:Index.ets

import { SimpleCalendarPage } from './SimpleCalendarPage';

@Entry
@Component
struct Index {
  build() {
    Column() {
      SimpleCalendarPage() // 调用简易日历页面
    }
    .padding(20)
  }
}
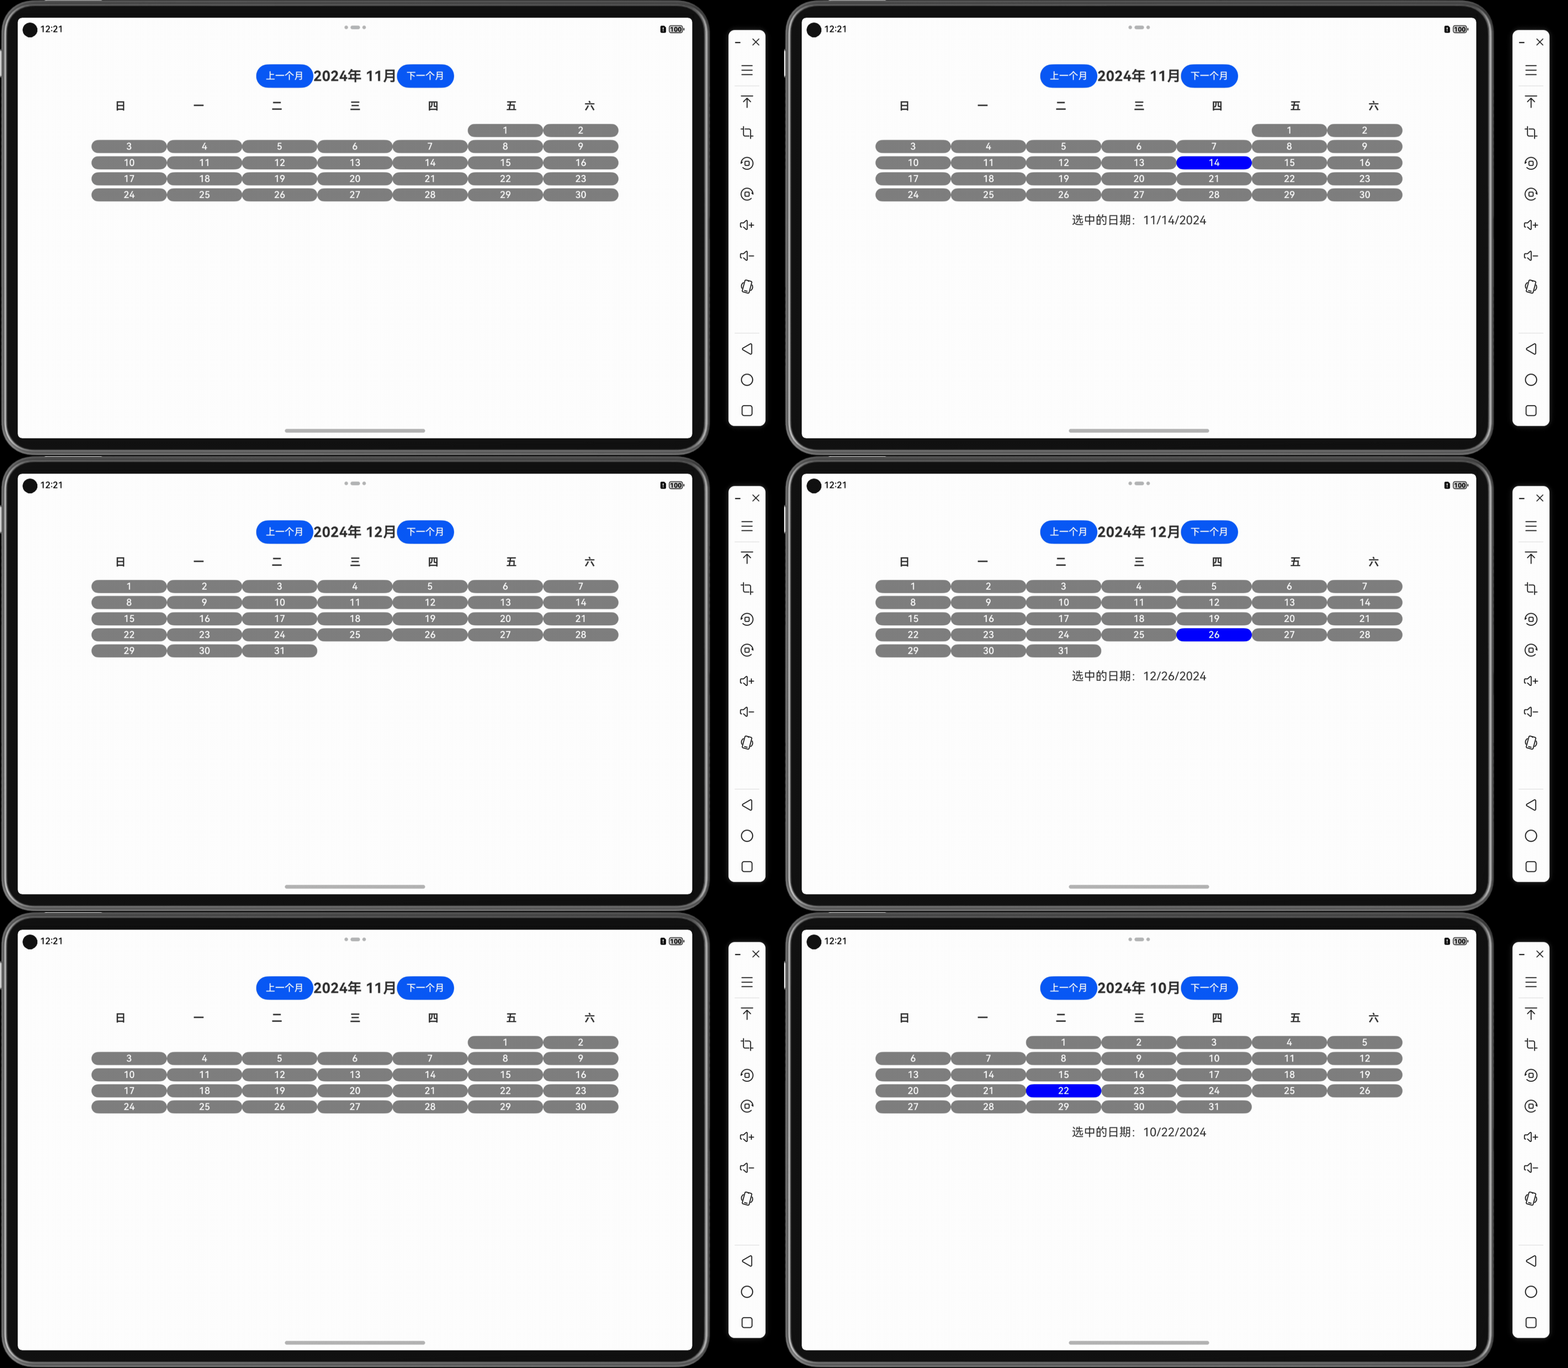
效果示例:用户可以通过按钮切换月份,并点击某一天高亮选中。界面实时更新,选中的日期显示在屏幕下方。
五、代码解读
- 状态管理:
@State currentDate和@State selectedDate用于保存当前显示的月份和选中的日期。 - 动态生成日期按钮:通过
getDatesInMonth方法动态生成当月的所有日期,使用ForEach渲染按钮。 - 日期高亮显示:通过
isSameDay方法判断是否选中某一天,并更新按钮的背景色。 - 月份切换逻辑:通过
changeMonth方法更新currentDate并重新计算日期。
六、优化建议
- 添加工作日和周末标记:用不同颜色标记工作日和周末,增加视觉提示。
- 支持跳转到指定日期:提供输入框或日期选择器,快速跳转到特定月份。
- 扩展交互功能:例如显示当月的节假日信息或增加任务记录功能。
七、相关知识点
小结
本篇通过动态生成日历网格,展示了如何结合状态管理和用户交互实现简易日历功能。用户可通过按钮切换月份,并高亮选中日期,体验鸿蒙系统的开发便捷性。
下一篇预告
在下一篇「UI互动应用篇13 - 数字滚动抽奖器」中,我们将探索如何设计一个富有趣味的抽奖应用。你将学习如何实现数字滚动效果,打造一个动态变化的抽奖界面,增加用户交互的趣味性与吸引力。
上一篇: 「Mac畅玩鸿蒙与硬件34」UI互动应用篇11 - 颜色选择器
下一篇: 「Mac畅玩鸿蒙与硬件36」UI互动应用篇13 - 数字滚动抽奖器
作者:SoraLuna 链接:https://www.nutpi.net/thread?topicId=312 來源:坚果派 著作权归作者所有。商业转载请联系作者获得授权,非商业转载请注明出处。
00
- 0回答
- 4粉丝
- 0关注
