[HarmonyOS NEXT 实战案例四:SideBarContainer] 侧边栏容器实战:音乐播放器侧边栏 - 播放列表与歌单管理 基础篇
[HarmonyOS NEXT 实战案例四:SideBarContainer] 侧边栏容器实战:音乐播放器侧边栏 - 播放列表与歌单管理 基础篇
项目已开源,开源地址: https://gitcode.com/nutpi/HarmonyosNextCaseStudyTutorial , 欢迎fork & star
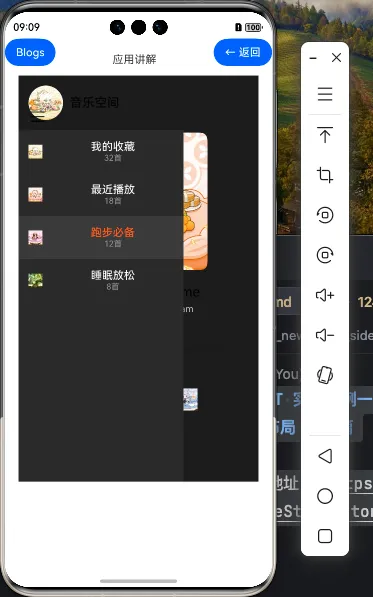
效果演示

一、组件概述
在现代音乐播放器应用中,侧边栏是展示播放列表和歌单的重要界面元素。通过HarmonyOS NEXT的SideBarContainer组件,我们可以轻松实现一个功能完善的音乐播放器侧边栏,为用户提供流畅的音乐浏览和播放体验。
1.1 SideBarContainer组件介绍
SideBarContainer是HarmonyOS NEXT提供的一个容器组件,专门用于创建带有侧边栏的布局。它支持三种显示模式:
- Embed模式:侧边栏嵌入在内容区域内,与主内容共享空间
- Overlay模式:侧边栏覆盖在主内容上方,显示时会遮挡部分主内容
- Auto模式:根据屏幕尺寸自动选择Embed或Overlay模式
在本案例中,我们使用Embed模式来实现音乐播放器的侧边栏,这样用户可以同时看到播放列表和当前播放的歌曲信息。
1.2 音乐播放器侧边栏的功能需求
一个功能完善的音乐播放器侧边栏通常需要满足以下需求:
- 显示播放列表和歌单
- 支持切换不同的歌单
- 显示当前播放歌曲的信息
- 提供播放控制功能(播放/暂停、上一首、下一首等)
- 显示播放进度和允许调整进度
接下来,我们将通过代码实现这些功能,并详细讲解每个部分的实现原理。
二、实战代码实现
2.1 基本结构
首先,让我们看一下音乐播放器侧边栏的基本结构:
@Entry
@Component
struct MusicPlayer {
  @State isSideBarShow: boolean = true
  @State currentSongIndex: number = 0
  @State isPlaying: boolean = false
  @State currentTime: number = 0
  @State totalTime: number = 280
  @State currentPlaylist: string = '最近播放'

  build() {
    SideBarContainer(SideBarContainerType.Embed) {
      // 侧边栏内容 - 播放列表和歌单
      this.SideBarContent()

      // 主内容区 - 当前播放歌曲信息和控制
      this.MainContent()
    }
    .controlButton({
      icons: {
        shown: $r('app.media.ic_sidebar_shown'),
        hidden: $r('app.media.ic_sidebar_hidden'),
      }
    })
    .sideBarWidth(300)
    .minSideBarWidth(150)
    .maxSideBarWidth(500)
    .onChange((isShow: boolean) => {
      this.isSideBarShow = isShow
    })
  }

  // 侧边栏内容构建器
  @Builder SideBarContent() {
    // 侧边栏内容实现...
  }

  // 主内容区构建器
  @Builder MainContent() {
    // 主内容区实现...
  }
}
这个基本结构包含了:
- 使用
SideBarContainer的Embed模式创建侧边栏布局 - 定义了几个关键的状态变量,如当前播放状态、当前歌曲索引等
- 使用
@Builder装饰器定义了侧边栏内容和主内容区的构建器
2.2 侧边栏内容 - 播放列表和歌单
接下来,我们实现侧边栏内容,包括播放列表和歌单:
@Builder SideBarContent() {
  Column() {
    // 标题
    Text('音乐库')
      .fontSize(24)
      .fontWeight(FontWeight.Bold)
      .margin({ top: 20, bottom: 20, left: 16 })

    // 歌单列表
    List() {
      // 歌单分类标题
      ListItem() {
        Text('我的歌单')
          .fontSize(16)
          .fontWeight(FontWeight.Medium)
          .margin({ left: 16, top: 10, bottom: 10 })
      }

      // 歌单列表项
      ForEach(this.playlists, (playlist: PlaylistInfo) => {
        ListItem() {
          Row() {
            Image(playlist.cover)
              .width(40)
              .height(40)
              .borderRadius(8)
              .margin({ right: 12 })

            Column() {
              Text(playlist.name)
                .fontSize(16)
                .fontColor(this.currentPlaylist === playlist.name ? '#007DFF' : '#000000')

              Text(`${playlist.count}首`)
                .fontSize(12)
                .fontColor('#888888')
                .margin({ top: 4 })
            }
            .alignItems(HorizontalAlign.Start)
            .layoutWeight(1)
          }
          .width('100%')
          .padding({ left: 16, right: 16, top: 8, bottom: 8 })
          .borderRadius(8)
          .backgroundColor(this.currentPlaylist === playlist.name ? '#F0F0F0' : '#FFFFFF')
        }
        .onClick(() => {
          this.currentPlaylist = playlist.name
          // 在实际应用中,这里会加载对应歌单的歌曲
        })
      })

      // 当前播放列表标题
      ListItem() {
        Text('当前播放')
          .fontSize(16)
          .fontWeight(FontWeight.Medium)
          .margin({ left: 16, top: 20, bottom: 10 })
      }

      // 当前播放列表歌曲
      ForEach(this.songs, (song: SongInfo, index: number) => {
        ListItem() {
          Row() {
            Text(`${index + 1}`)
              .fontSize(16)
              .fontColor('#888888')
              .width(30)

            Column() {
              Text(song.title)
                .fontSize(16)
                .fontColor(this.currentSongIndex === index ? '#007DFF' : '#000000')
                .maxLines(1)
                .textOverflow({ overflow: TextOverflow.Ellipsis })

              Text(song.artist)
                .fontSize(12)
                .fontColor('#888888')
                .margin({ top: 4 })
                .maxLines(1)
                .textOverflow({ overflow: TextOverflow.Ellipsis })
            }
            .alignItems(HorizontalAlign.Start)
            .layoutWeight(1)

            Text(this.formatDuration(song.duration))
              .fontSize(14)
              .fontColor('#888888')
          }
          .width('100%')
          .padding({ left: 16, right: 16, top: 8, bottom: 8 })
          .borderRadius(8)
          .backgroundColor(this.currentSongIndex === index ? '#F0F0F0' : '#FFFFFF')
        }
        .onClick(() => {
          this.currentSongIndex = index
          this.currentTime = 0
          this.totalTime = song.duration
          this.isPlaying = true
        })
      })
    }
    .layoutWeight(1)
  }
  .width('100%')
  .height('100%')
}
在这个侧边栏内容中,我们实现了:
- 歌单列表:显示用户的歌单,包括封面、名称和歌曲数量
- 当前播放列表:显示当前播放列表中的歌曲,包括序号、标题、艺术家和时长
- 交互功能:点击歌单可以切换当前播放列表,点击歌曲可以切换当前播放的歌曲
2.3 主内容区 - 当前播放歌曲信息和控制
接下来,我们实现主内容区,显示当前播放歌曲的信息和控制:
@Builder MainContent() {
  Column() {
    // 当前播放歌曲信息
    Column() {
      // 歌曲封面
      Image(this.songs[this.currentSongIndex].cover)
        .width('60%')
        .aspectRatio(1)
        .borderRadius(12)
        .margin({ top: 40 })

      // 歌曲标题和艺术家
      Text(this.songs[this.currentSongIndex].title)
        .fontSize(24)
        .fontWeight(FontWeight.Bold)
        .margin({ top: 20 })

      Text(this.songs[this.currentSongIndex].artist)
        .fontSize(16)
        .fontColor('#888888')
        .margin({ top: 8 })

      // 播放进度条
      Column() {
        Slider({
          value: this.currentTime,
          min: 0,
          max: this.totalTime,
          step: 1,
          style: SliderStyle.OutSet
        })
          .width('90%')
          .onChange((value: number) => {
            this.currentTime = value
          })

        // 时间显示
        Row() {
          Text(this.formatDuration(this.currentTime))
            .fontSize(12)
            .fontColor('#888888')

          Text(this.formatDuration(this.totalTime))
            .fontSize(12)
            .fontColor('#888888')
        }
        .width('90%')
        .justifyContent(FlexAlign.SpaceBetween)
        .margin({ top: 8 })
      }
      .margin({ top: 40 })

      // 播放控制按钮
      Row() {
        // 上一首按钮
        Image($r('app.media.ic_previous'))
          .width(40)
          .height(40)
          .onClick(() => {
            this.playPrevious()
          })

        // 播放/暂停按钮
        Image(this.isPlaying ? $r('app.media.ic_pause') : $r('app.media.ic_play'))
          .width(60)
          .height(60)
          .margin({ left: 40, right: 40 })
          .onClick(() => {
            this.isPlaying = !this.isPlaying
          })

        // 下一首按钮
        Image($r('app.media.ic_next'))
          .width(40)
          .height(40)
          .onClick(() => {
            this.playNext()
          })
      }
      .margin({ top: 40 })
    }
    .width('100%')
    .layoutWeight(1)
    .justifyContent(FlexAlign.Start)
    .alignItems(HorizontalAlign.Center)
  }
  .width('100%')
  .height('100%')
  .backgroundColor('#FFFFFF')
}
在主内容区中,我们实现了:
- 歌曲信息显示:显示当前播放歌曲的封面、标题和艺术家
- 播放进度条:使用
Slider组件显示播放进度,并允许用户调整进度 - 播放控制按钮:提供上一首、播放/暂停、下一首按钮
2.4 辅助方法和数据模型
为了支持上述功能,我们需要定义一些辅助方法和数据模型:
// 歌单信息数据模型
interface PlaylistInfo {
  name: string
  cover: Resource
  count: number
}

// 歌曲信息数据模型
interface SongInfo {
  title: string
  artist: string
  cover: Resource
  duration: number
}

@Entry
@Component
struct MusicPlayer {
  // 状态变量...

  // 歌单数据
  private playlists: PlaylistInfo[] = [
    { name: '最近播放', cover: $r('app.media.playlist1'), count: 28 },
    { name: '我喜欢的', cover: $r('app.media.playlist2'), count: 45 },
    { name: '流行音乐', cover: $r('app.media.playlist3'), count: 32 },
    { name: '轻音乐', cover: $r('app.media.playlist4'), count: 18 },
    { name: '摇滚', cover: $r('app.media.playlist5'), count: 24 }
  ]

  // 歌曲数据
  private songs: SongInfo[] = [
    { title: '夜曲', artist: '周杰伦', cover: $r('app.media.song1'), duration: 280 },
    { title: '起风了', artist: '买辣椒也用券', cover: $r('app.media.song2'), duration: 312 },
    { title: '海阔天空', artist: 'Beyond', cover: $r('app.media.song3'), duration: 326 },
    { title: '稻香', artist: '周杰伦', cover: $r('app.media.song4'), duration: 234 },
    { title: '光辉岁月', artist: 'Beyond', cover: $r('app.media.song5'), duration: 302 },
    { title: '晴天', artist: '周杰伦', cover: $r('app.media.song6'), duration: 269 },
    { title: '平凡之路', artist: '朴树', cover: $r('app.media.song7'), duration: 293 },
    { title: '青花瓷', artist: '周杰伦', cover: $r('app.media.song8'), duration: 241 }
  ]

  // 格式化时长
  private formatDuration(seconds: number): string {
    const minutes = Math.floor(seconds / 60)
    const remainingSeconds = Math.floor(seconds % 60)
    return `${minutes}:${remainingSeconds.toString().padStart(2, '0')}`
  }

  // 播放上一首
  private playPrevious() {
    this.currentSongIndex = (this.currentSongIndex - 1 + this.songs.length) % this.songs.length
    this.currentTime = 0
    this.totalTime = this.songs[this.currentSongIndex].duration
    this.isPlaying = true
  }

  // 播放下一首
  private playNext() {
    this.currentSongIndex = (this.currentSongIndex + 1) % this.songs.length
    this.currentTime = 0
    this.totalTime = this.songs[this.currentSongIndex].duration
    this.isPlaying = true
  }

  // 构建器...
}
在这部分代码中,我们定义了:
- 数据模型:定义了
PlaylistInfo和SongInfo接口,用于描述歌单和歌曲的数据结构 - 模拟数据:创建了模拟的歌单和歌曲数据,在实际应用中,这些数据通常来自网络请求或本地数据库
- 辅助方法:
formatDuration:将秒数格式化为分:秒格式playPrevious:播放上一首歌曲playNext:播放下一首歌曲
三、代码详解
3.1 SideBarContainer配置
SideBarContainer(SideBarContainerType.Embed) {
  // 侧边栏内容
  this.SideBarContent()

  // 主内容区
  this.MainContent()
}
.controlButton({
  icons: {
    shown: $r('app.media.ic_sidebar_shown'),
    hidden: $r('app.media.ic_sidebar_hidden'),
  }
})
.sideBarWidth(300)
.minSideBarWidth(150)
.maxSideBarWidth(500)
.onChange((isShow: boolean) => {
  this.isSideBarShow = isShow
})
这段代码配置了SideBarContainer组件:
- 显示模式:使用
SideBarContainerType.Embed,将侧边栏嵌入在主内容区内 - 控制按钮:通过
controlButton属性设置显示和隐藏状态的图标 - 侧边栏宽度:
sideBarWidth:设置默认宽度为300像素minSideBarWidth:设置最小宽度为150像素maxSideBarWidth:设置最大宽度为500像素
- 状态变化监听:通过
onChange回调函数监听侧边栏显示状态的变化
3.2 侧边栏内容详解
侧边栏内容主要包括两部分:歌单列表和当前播放列表。
歌单列表
// 歌单列表
List() {
  // 歌单分类标题
  ListItem() {
    Text('我的歌单')
      .fontSize(16)
      .fontWeight(FontWeight.Medium)
      .margin({ left: 16, top: 10, bottom: 10 })
  }

  // 歌单列表项
  ForEach(this.playlists, (playlist: PlaylistInfo) => {
    ListItem() {
      Row() {
        Image(playlist.cover)
          .width(40)
          .height(40)
          .borderRadius(8)
          .margin({ right: 12 })

        Column() {
          Text(playlist.name)
            .fontSize(16)
            .fontColor(this.currentPlaylist === playlist.name ? '#007DFF' : '#000000')

          Text(`${playlist.count}首`)
            .fontSize(12)
            .fontColor('#888888')
            .margin({ top: 4 })
        }
        .alignItems(HorizontalAlign.Start)
        .layoutWeight(1)
      }
      .width('100%')
      .padding({ left: 16, right: 16, top: 8, bottom: 8 })
      .borderRadius(8)
      .backgroundColor(this.currentPlaylist === playlist.name ? '#F0F0F0' : '#FFFFFF')
    }
    .onClick(() => {
      this.currentPlaylist = playlist.name
      // 在实际应用中,这里会加载对应歌单的歌曲
    })
  })

  // ...
}
这段代码实现了歌单列表:
- 使用
List和ListItem组件创建列表 - 使用
ForEach遍历playlists数组,为每个歌单创建一个列表项 - 每个歌单项包含封面图片、名称和歌曲数量
- 通过比较
currentPlaylist和playlist.name,为当前选中的歌单应用不同的样式 - 点击歌单项时,更新
currentPlaylist状态变量
当前播放列表
// 当前播放列表标题
ListItem() {
  Text('当前播放')
    .fontSize(16)
    .fontWeight(FontWeight.Medium)
    .margin({ left: 16, top: 20, bottom: 10 })
}

// 当前播放列表歌曲
ForEach(this.songs, (song: SongInfo, index: number) => {
  ListItem() {
    Row() {
      Text(`${index + 1}`)
        .fontSize(16)
        .fontColor('#888888')
        .width(30)

      Column() {
        Text(song.title)
          .fontSize(16)
          .fontColor(this.currentSongIndex === index ? '#007DFF' : '#000000')
          .maxLines(1)
          .textOverflow({ overflow: TextOverflow.Ellipsis })

        Text(song.artist)
          .fontSize(12)
          .fontColor('#888888')
          .margin({ top: 4 })
          .maxLines(1)
          .textOverflow({ overflow: TextOverflow.Ellipsis })
      }
      .alignItems(HorizontalAlign.Start)
      .layoutWeight(1)

      Text(this.formatDuration(song.duration))
        .fontSize(14)
        .fontColor('#888888')
    }
    .width('100%')
    .padding({ left: 16, right: 16, top: 8, bottom: 8 })
    .borderRadius(8)
    .backgroundColor(this.currentSongIndex === index ? '#F0F0F0' : '#FFFFFF')
  }
  .onClick(() => {
    this.currentSongIndex = index
    this.currentTime = 0
    this.totalTime = song.duration
    this.isPlaying = true
  })
})
这段代码实现了当前播放列表:
- 使用
ForEach遍历songs数组,为每首歌曲创建一个列表项 - 每个歌曲项包含序号、标题、艺术家和时长
- 通过比较
currentSongIndex和index,为当前播放的歌曲应用不同的样式 - 点击歌曲项时,更新
currentSongIndex、currentTime、totalTime和isPlaying状态变量
3.3 主内容区详解
主内容区主要显示当前播放歌曲的信息和控制。
歌曲信息显示
// 歌曲封面
Image(this.songs[this.currentSongIndex].cover)
  .width('60%')
  .aspectRatio(1)
  .borderRadius(12)
  .margin({ top: 40 })

// 歌曲标题和艺术家
Text(this.songs[this.currentSongIndex].title)
  .fontSize(24)
  .fontWeight(FontWeight.Bold)
  .margin({ top: 20 })

Text(this.songs[this.currentSongIndex].artist)
  .fontSize(16)
  .fontColor('#888888')
  .margin({ top: 8 })
这段代码显示了当前播放歌曲的信息:
- 使用
Image组件显示歌曲封面,设置宽度为父容器的60%,并保持1:1的宽高比 - 使用
Text组件显示歌曲标题,设置较大的字体大小和粗体 - 使用
Text组件显示艺术家名称,设置较小的字体大小和灰色字体
播放进度条
// 播放进度条
Column() {
  Slider({
    value: this.currentTime,
    min: 0,
    max: this.totalTime,
    step: 1,
    style: SliderStyle.OutSet
  })
    .width('90%')
    .onChange((value: number) => {
      this.currentTime = value
    })

  // 时间显示
  Row() {
    Text(this.formatDuration(this.currentTime))
      .fontSize(12)
      .fontColor('#888888')

    Text(this.formatDuration(this.totalTime))
      .fontSize(12)
      .fontColor('#888888')
  }
  .width('90%')
  .justifyContent(FlexAlign.SpaceBetween)
  .margin({ top: 8 })
}
.margin({ top: 40 })
这段代码实现了播放进度条:
- 使用
Slider组件显示播放进度,设置最小值为0,最大值为歌曲总时长 - 通过
onChange回调函数,在用户调整进度条时更新currentTime状态变量 - 在进度条下方显示当前播放时间和总时长,使用
formatDuration方法格式化时间
播放控制按钮
// 播放控制按钮
Row() {
  // 上一首按钮
  Image($r('app.media.ic_previous'))
    .width(40)
    .height(40)
    .onClick(() => {
      this.playPrevious()
    })

  // 播放/暂停按钮
  Image(this.isPlaying ? $r('app.media.ic_pause') : $r('app.media.ic_play'))
    .width(60)
    .height(60)
    .margin({ left: 40, right: 40 })
    .onClick(() => {
      this.isPlaying = !this.isPlaying
    })

  // 下一首按钮
  Image($r('app.media.ic_next'))
    .width(40)
    .height(40)
    .onClick(() => {
      this.playNext()
    })
}
.margin({ top: 40 })
这段代码实现了播放控制按钮:
- 使用
Image组件显示上一首、播放/暂停和下一首按钮 - 播放/暂停按钮根据
isPlaying状态变量显示不同的图标 - 点击上一首按钮时,调用
playPrevious方法 - 点击播放/暂停按钮时,切换
isPlaying状态变量 - 点击下一首按钮时,调用
playNext方法
3.4 辅助方法详解
格式化时长
// 格式化时长
private formatDuration(seconds: number): string {
  const minutes = Math.floor(seconds / 60)
  const remainingSeconds = Math.floor(seconds % 60)
  return `${minutes}:${remainingSeconds.toString().padStart(2, '0')}`
}
这个方法将秒数格式化为分:秒格式:
- 使用
Math.floor(seconds / 60)计算分钟数 - 使用
Math.floor(seconds % 60)计算剩余的秒数 - 使用
padStart方法确保秒数始终显示为两位数
播放控制方法
// 播放上一首
private playPrevious() {
  this.currentSongIndex = (this.currentSongIndex - 1 + this.songs.length) % this.songs.length
  this.currentTime = 0
  this.totalTime = this.songs[this.currentSongIndex].duration
  this.isPlaying = true
}

// 播放下一首
private playNext() {
  this.currentSongIndex = (this.currentSongIndex + 1) % this.songs.length
  this.currentTime = 0
  this.totalTime = this.songs[this.currentSongIndex].duration
  this.isPlaying = true
}
这两个方法实现了播放上一首和下一首的功能:
- 使用模运算确保索引在有效范围内,实现循环播放
- 重置
currentTime为0,表示从头开始播放 - 更新
totalTime为新歌曲的时长 - 设置
isPlaying为true,表示开始播放
四、布局技巧与最佳实践
4.1 侧边栏宽度设置
在音乐播放器应用中,侧边栏宽度的设置非常重要,它影响用户浏览播放列表的体验。我们使用了以下属性来控制侧边栏宽度:
.sideBarWidth(300)     // 默认宽度
.minSideBarWidth(150)  // 最小宽度
.maxSideBarWidth(500)  // 最大宽度
这种设置有以下优点:
- 默认宽度:300像素提供了足够的空间显示歌单和歌曲信息,同时不会占用太多主内容区的空间
- 最小宽度:150像素确保即使在用户调整侧边栏宽度时,仍然能够显示基本的歌曲信息
- 最大宽度:500像素防止侧边栏占用过多空间,保持主内容区的可用性
4.2 列表项布局优化
在歌单和歌曲列表项中,我们使用了Row和Column组件来创建灵活的布局:
Row() {
  Image(playlist.cover)
    .width(40)
    .height(40)
    .borderRadius(8)
    .margin({ right: 12 })

  Column() {
    Text(playlist.name)
      .fontSize(16)
      .fontColor(this.currentPlaylist === playlist.name ? '#007DFF' : '#000000')

    Text(`${playlist.count}首`)
      .fontSize(12)
      .fontColor('#888888')
      .margin({ top: 4 })
  }
  .alignItems(HorizontalAlign.Start)
  .layoutWeight(1)
}
这种布局有以下优点:
- 水平排列:使用
Row组件将封面图片和文本信息水平排列 - 垂直排列:使用
Column组件将标题和副标题垂直排列 - 弹性布局:使用
layoutWeight(1)使文本区域占用剩余空间 - 对齐方式:使用
alignItems(HorizontalAlign.Start)使文本左对齐
4.3 文本溢出处理
在显示歌曲标题和艺术家名称时,我们使用了文本溢出处理:
Text(song.title)
  .fontSize(16)
  .fontColor(this.currentSongIndex === index ? '#007DFF' : '#000000')
  .maxLines(1)
  .textOverflow({ overflow: TextOverflow.Ellipsis })
这种处理有以下优点:
- 最大行数限制:使用
maxLines(1)限制文本只显示一行 - 溢出处理:使用
textOverflow({ overflow: TextOverflow.Ellipsis })在文本溢出时显示省略号 - 一致的布局:确保即使歌曲标题很长,列表项的高度也保持一致
4.4 播放控制优化
在播放控制部分,我们使用了不同大小的按钮来突出主要功能:
// 上一首按钮
Image($r('app.media.ic_previous'))
  .width(40)
  .height(40)

// 播放/暂停按钮
Image(this.isPlaying ? $r('app.media.ic_pause') : $r('app.media.ic_play'))
  .width(60)
  .height(60)
  .margin({ left: 40, right: 40 })

// 下一首按钮
Image($r('app.media.ic_next'))
  .width(40)
  .height(40)
这种设计有以下优点:
- 主次分明:播放/暂停按钮比上一首和下一首按钮大,突出其作为主要控制按钮的地位
- 间距合理:使用
margin属性为按钮之间添加适当的间距,提高可点击性 - 状态反馈:根据
isPlaying状态显示不同的图标,提供直观的状态反馈
4.5 响应式布局
我们的布局设计考虑了不同屏幕尺寸的适配:
- 百分比宽度:使用
width('60%')等百分比值,使布局能够适应不同宽度的屏幕 - 弹性布局:使用
layoutWeight(1)使组件能够根据可用空间调整大小 - 可调整侧边栏:允许用户调整侧边栏宽度,适应个人偏好
五、总结
在本教程中,我们学习了如何使用HarmonyOS NEXT的SideBarContainer组件创建一个功能完善的音乐播放器侧边栏。 通过这个案例,我们展示了SideBarContainer组件在音乐播放器应用中的应用,以及如何使用HarmonyOS NEXT的其他组件(如List、Image、Text、Slider等)创建丰富的用户界面。 在进阶篇中,我们将进一步探讨如何为音乐播放器添加更多高级功能,如歌词显示、均衡器设置、播放模式切换等,以及如何优化应用的性能和用户体验。
