[HarmonyOS NEXT 实战案例三:SideBarContainer] 侧边栏容器实战:社交应用联系人列表 进阶篇
[HarmonyOS NEXT 实战案例三:SideBarContainer] 侧边栏容器实战:社交应用联系人列表 进阶篇
项目已开源,开源地址: https://gitcode.com/nutpi/HarmonyosNextCaseStudyTutorial , 欢迎fork & star
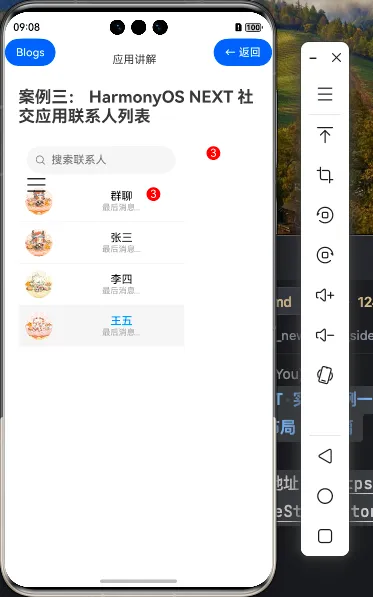
效果演示
在基础篇中,我们学习了如何使用HarmonyOS NEXT的SideBarContainer组件创建社交应用的基本联系人侧边栏布局。本篇教程将深入探讨如何为社交应用添加更多交互功能和状态管理,提升用户体验。
一、状态管理进阶
在实际应用中,状态管理是构建交互式UI的关键。对于社交应用,我们需要管理多种状态,如联系人列表、当前聊天、消息历史、在线状态等。
1.1 状态变量设计
首先,让我们扩展SocialContacts组件的状态变量:
@Component
export struct SocialContacts {
    // 侧边栏显示状态
    @State isSideBarShow: boolean = true
    // 当前选中的聊天对象
    @State currentChat: string = '群聊'
    // 联系人数据
    @State contacts: Contact[] = []
    // 消息历史记录
    @State messageHistory: Map<string, Message[]> = new Map()
    // 搜索关键词
    @State searchKeyword: string = ''
    // 用户在线状态
    @State onlineStatus: Map<string, boolean> = new Map()
    // 是否显示搜索结果
    @State isSearching: boolean = false

    // ...
}
这些状态变量将帮助我们实现更复杂的交互功能:
messageHistory:存储每个联系人的消息历史searchKeyword:存储搜索框中的关键词onlineStatus:存储每个联系人的在线状态isSearching:标记是否正在搜索,用于控制UI显示
1.2 数据模型定义
为了更好地组织数据,我们需要定义更完善的数据模型:
// 联系人数据模型
interface Contact {
    id: string        // 唯一标识符
    name: string      // 联系人名称
    avatar: Resource  // 头像资源
    unread: number    // 未读消息数
    lastMessage?: string  // 最后一条消息
    lastTime?: Date   // 最后消息时间
}

// 消息数据模型
class Message {
    id: string        // 消息ID
    senderId: string  // 发送者ID
    content: string   // 消息内容
    timestamp: Date   // 发送时间
    isRead: boolean   // 是否已读
    type: MessageType // 消息类型(文本、图片等)

    constructor(senderId: string, content: string, type: MessageType = MessageType.TEXT) {
        this.id = generateUUID()  // 生成唯一ID
        this.senderId = senderId
        this.content = content
        this.timestamp = new Date()
        this.isRead = false
        this.type = type
    }
}

// 消息类型枚举
enum MessageType {
    TEXT,
    IMAGE,
    VOICE,
    FILE
}
这些数据模型将帮助我们更好地组织和管理应用数据,提高代码的可维护性。
1.3 模拟数据生成
在实际应用中,数据通常来自网络请求。这里我们使用模拟数据:
// 生成模拟联系人数据
private generateMockContacts(): Array<Contact> {
    return [
        { id: 'group', name: '群聊', avatar: $r('app.media.big8'), unread: 3, lastMessage: '小王:今天会议取消了', lastTime: new Date(Date.now() - 300000) },
        { id: 'user1', name: '张三', avatar: $r('app.media.big7'), unread: 0, lastMessage: '好的,明天见!', lastTime: new Date(Date.now() - 3600000) },
        { id: 'user2', name: '李四', avatar: $r('app.media.big6'), unread: 5, lastMessage: '请查收文件', lastTime: new Date(Date.now() - 7200000) },
        { id: 'user3', name: '王五', avatar: $r('app.media.big5'), unread: 1, lastMessage: '什么时候开会?', lastTime: new Date(Date.now() - 86400000) },
        { id: 'user4', name: '赵六', avatar: $r('app.media.big4'), unread: 0, lastMessage: '项目进展如何?', lastTime: new Date(Date.now() - 172800000) }
    ]
}

// 生成模拟消息历史
private generateMockMessageHistory(): Map<string, Message[]> {
    const history = new Map<string, Message[]>()

    // 群聊消息
    history.set('group', [
        new Message('user3', '大家好,我是王五'),
        new Message('user1', '你好,我是张三'),
        new Message('user2', '你们好,我是李四'),
        new Message('user4', '大家今天有空开个会吗?'),
        new Message('user3', '我今天有事,明天可以'),
        new Message('user2', '我也是明天有空'),
        new Message('user4', '那就明天上午10点?'),
        new Message('user1', '可以的'),
        new Message('user3', '没问题'),
        new Message('user2', '好的'),
        new Message('user4', '今天会议取消了')
    ])

    // 私聊消息
    history.set('user1', [
        new Message('user1', '你好,我是张三'),
        new Message('self', '你好,有什么事吗?'),
        new Message('user1', '明天的会议你参加吗?'),
        new Message('self', '是的,我会参加'),
        new Message('user1', '好的,明天见!')
    ])

    // 其他联系人的消息...

    return history
}

// 生成模拟在线状态
private generateMockOnlineStatus(): Map<string, boolean> {
    const status = new Map<string, boolean>()
    status.set('user1', true)
    status.set('user2', false)
    status.set('user3', true)
    status.set('user4', false)
    return status
}
在组件的aboutToAppear生命周期函数中初始化这些数据:
aboutToAppear() {
    this.contacts = this.generateMockContacts()
    this.messageHistory = this.generateMockMessageHistory()
    this.onlineStatus = this.generateMockOnlineStatus()
}
二、交互功能实现
2.1 联系人搜索功能
搜索功能是社交应用的基本功能,让我们实现一个简单的搜索功能:
// 搜索框组件
Search({ placeholder: '搜索联系人' })
    .width('90%')
    .margin(10)
    .onChange((value: string) => {
        this.searchKeyword = value
        this.isSearching = value.length > 0
    })

// 获取过滤后的联系人列表
private getFilteredContacts(): Array<Contact> {
    if (!this.isSearching) {
        return this.contacts
    }

    return this.contacts.filter(contact =>
        contact.name.toLowerCase().includes(this.searchKeyword.toLowerCase())
    )
}
然后在列表渲染时使用过滤后的联系人列表:
List() {
    ForEach(this.getFilteredContacts(), (item: Contact) => {
        // 列表项渲染...
    })
}
2.2 联系人排序功能
在社交应用中,通常会根据最后消息时间对联系人进行排序:
// 获取排序后的联系人列表
private getSortedContacts(): Array<Contact> {
    const filteredContacts = this.getFilteredContacts()

    // 根据最后消息时间排序,最新的在前面
    return [...filteredContacts].sort((a, b) => {
        if (!a.lastTime) return 1
        if (!b.lastTime) return -1
        return b.lastTime.getTime() - a.lastTime.getTime()
    })
}
然后在列表渲染时使用排序后的联系人列表:
List() {
    ForEach(this.getSortedContacts(), (item: Contact) => {
        // 列表项渲染...
    })
}
2.3 消息发送功能
让我们在主内容区添加消息发送功能:
// 主内容区 - 聊天窗口
Column() {
    // 聊天头部
    Row() {
        Text(this.getCurrentContactName())
            .fontSize(18)
            .fontWeight(FontWeight.Bold)
        Text(this.isContactOnline(this.currentChat) ? '在线' : '离线')
            .fontSize(14)
            .fontColor(this.isContactOnline(this.currentChat) ? '#4CAF50' : '#9E9E9E')
            .margin({ left: 10 })
    }
    .width('100%')
    .padding(15)
    .backgroundColor('#f5f5f5')

    // 消息列表
    List({ space: 10 }) {
        ForEach(this.getCurrentMessages(), (message: Message) => {
            ListItem() {
                this.MessageBubble(message)
            }
        })
    }
    .width('100%')
    .layoutWeight(1)
    .padding(10)

    // 消息输入区
    Row() {
        TextInput({ placeholder: '输入消息...' })
            .width('80%')
            .height(40)
            .backgroundColor('#f5f5f5')
            .borderRadius(20)
            .padding({ left: 15, right: 15 })
            .onChange((value: string) => {
                this.newMessage = value
            })

        Button('发送')
            .width('15%')
            .height(40)
            .margin({ left: 10 })
            .onClick(() => {
                this.sendMessage()
            })
    }
    .width('100%')
    .padding(10)
    .backgroundColor('#ffffff')
}

// 消息气泡组件
@Builder
MessageBubble(message: Message) {
    Row() {
        if (message.senderId === 'self') {
            Blank()
            Column() {
                Text(message.content)
                    .fontSize(16)
                    .backgroundColor('#DCF8C6')
                    .padding(10)
                    .borderRadius(10)
                Text(this.formatTime(message.timestamp))
                    .fontSize(12)
                    .fontColor('#9E9E9E')
                    .margin({ top: 5 })
            }
            .alignItems(HorizontalAlign.End)
            .margin({ left: 50 })
        } else {
            Column() {
                Text(message.content)
                    .fontSize(16)
                    .backgroundColor('#FFFFFF')
                    .padding(10)
                    .borderRadius(10)
                Text(this.formatTime(message.timestamp))
                    .fontSize(12)
                    .fontColor('#9E9E9E')
                    .margin({ top: 5 })
            }
            .margin({ right: 50 })
            Blank()
        }
    }
    .width('100%')
    .margin({ top: 5, bottom: 5 })
}

// 发送消息
private sendMessage() {
    if (!this.newMessage || this.newMessage.trim() === '') {
        return
    }

    const message = new Message('self', this.newMessage, MessageType.TEXT)

    // 更新消息历史
    const messages = this.messageHistory.get(this.currentChat) || []
    messages.push(message)
    this.messageHistory.set(this.currentChat, messages)

    // 更新联系人最后消息和时间
    const contactIndex = this.contacts.findIndex(c => c.id === this.currentChat)
    if (contactIndex >= 0) {
        this.contacts[contactIndex].lastMessage = this.newMessage
        this.contacts[contactIndex].lastTime = new Date()
    }

    // 清空输入框
    this.newMessage = ''
}
2.4 辅助方法实现
为了支持上述功能,我们需要实现一些辅助方法:
// 获取当前联系人名称
private getCurrentContactName(): string {
    const contact = this.contacts.find(c => c.id === this.currentChat)
    return contact ? contact.name : ''
}

// 检查联系人是否在线
private isContactOnline(contactId: string): boolean {
    return this.onlineStatus.get(contactId) || false
}

// 获取当前聊天的消息历史
private getCurrentMessages(): Array<Message> {
    return this.messageHistory.get(this.currentChat) || []
}

// 格式化时间
private formatTime(date: Date): string {
    const now = new Date()
    const diff = now.getTime() - date.getTime()

    // 今天内的消息显示时间
    if (diff < 86400000 && now.getDate() === date.getDate()) {
        return `${date.getHours().toString().padStart(2, '0')}:${date.getMinutes().toString().padStart(2, '0')}`
    }

    // 昨天的消息
    if (diff < 172800000 && now.getDate() - date.getDate() === 1) {
        return `昨天 ${date.getHours().toString().padStart(2, '0')}:${date.getMinutes().toString().padStart(2, '0')}`
    }

    // 更早的消息显示日期
    return `${date.getMonth() + 1}月${date.getDate()}日`
}

// 生成UUID
private generateUUID(): string {
    return 'xxxxxxxx-xxxx-4xxx-yxxx-xxxxxxxxxxxx'.replace(/[xy]/g, function(c) {
        const r = Math.random() * 16 | 0
        const v = c === 'x' ? r : (r & 0x3 | 0x8)
        return v.toString(16)
    })
}
三、联系人项组件增强
现在让我们增强联系人项组件,显示更多信息:
@Component
struct ContactItem {
    @Prop contact: Contact
    @Prop isActive: boolean
    @Prop isOnline: boolean

    build() {
        Row() {
            // 头像+未读标记+在线状态
            Stack() {
                Image(this.contact.avatar)
                    .width(40)
                    .height(40)
                    .borderRadius(20)

                if (this.contact.unread > 0) {
                    Text(this.contact.unread.toString())
                        .width(20)
                        .height(20)
                        .borderRadius(10)
                        .backgroundColor('#ff0000')
                        .fontColor(Color.White)
                        .textAlign(TextAlign.Center)
                        .position({ x: '80%', y: '0%' })
                }

                if (this.isOnline && this.contact.id !== 'group') {
                    Circle({ width: 12, height: 12 })
                        .fill('#4CAF50')
                        .position({ x: '80%', y: '80%' })
                }
            }
            .margin(10)

            // 联系人信息
            Column() {
                Row() {
                    Text(this.contact.name)
                        .fontSize(16)
                        .fontColor(this.isActive ? '#007aff' : '#000000')
                        .layoutWeight(1)

                    if (this.contact.lastTime) {
                        Text(this.formatTime(this.contact.lastTime))
                            .fontSize(12)
                            .fontColor('#9E9E9E')
                    }
                }
                .width('100%')

                if (this.contact.lastMessage) {
                    Text(this.contact.lastMessage)
                        .fontSize(14)
                        .fontColor('#666666')
                        .maxLines(1)
                        .textOverflow({ overflow: TextOverflow.Ellipsis })
                }
            }
            .layoutWeight(1)
        }
        .width('100%')
        .backgroundColor(this.isActive ? '#f5f5f5' : '#ffffff')
        .padding({ top: 5, bottom: 5 })
    }

    // 格式化时间
    private formatTime(date: Date): string {
        const now = new Date()
        const diff = now.getTime() - date.getTime()

        // 今天内的消息显示时间
        if (diff < 86400000 && now.getDate() === date.getDate()) {
            return `${date.getHours().toString().padStart(2, '0')}:${date.getMinutes().toString().padStart(2, '0')}`
        }

        // 昨天的消息
        if (diff < 172800000 && now.getDate() - date.getDate() === 1) {
            return `昨天`
        }

        // 更早的消息显示日期
        return `${date.getMonth() + 1}月${date.getDate()}日`
    }
}
然后在主组件中使用增强后的联系人项组件:
ListItem() {
    ContactItem({
        contact: item,
        isActive: this.currentChat === item.id,
        isOnline: this.isContactOnline(item.id)
    })
}
.onClick(() => {
    this.currentChat = item.id

    // 点击后清除未读
    if (item.unread > 0) {
        const index = this.contacts.findIndex(c => c.id === item.id)
        if (index >= 0) {
            this.contacts[index].unread = 0
        }

        // 将消息标记为已读
        const messages = this.messageHistory.get(item.id) || []
        messages.forEach(msg => {
            if (msg.senderId !== 'self') {
                msg.isRead = true
            }
        })
    }
})
四、生命周期管理
在实际应用中,我们需要合理管理组件的生命周期,包括初始化数据、释放资源等。
4.1 组件生命周期函数
@Component
export struct SocialContacts {
    // 状态变量...

    // 模拟轮询定时器
    private pollingTimer: number = -1

    aboutToAppear() {
        // 初始化数据
        this.contacts = this.generateMockContacts()
        this.messageHistory = this.generateMockMessageHistory()
        this.onlineStatus = this.generateMockOnlineStatus()

        // 启动模拟消息轮询
        this.startMessagePolling()
    }

    aboutToDisappear() {
        // 清理资源
        if (this.pollingTimer !== -1) {
            clearInterval(this.pollingTimer)
            this.pollingTimer = -1
        }
    }

    // 启动模拟消息轮询
    private startMessagePolling() {
        // 每30秒模拟接收一条新消息
        this.pollingTimer = setInterval(() => {
            this.simulateReceiveMessage()
        }, 30000)
    }

    // 模拟接收消息
    private simulateReceiveMessage() {
        // 随机选择一个联系人
        const randomIndex = Math.floor(Math.random() * this.contacts.length)
        const contact = this.contacts[randomIndex]

        // 如果不是当前聊天对象,增加未读数
        if (contact.id !== this.currentChat) {
            contact.unread += 1
        }

        // 生成随机消息内容
        const messageContents = [
            '你好,最近怎么样?',
            '有时间聊聊吗?',
            '项目进展如何?',
            '周末有空吗?',
            '看到那条新闻了吗?'
        ]
        const randomContent = messageContents[Math.floor(Math.random() * messageContents.length)]

        // 创建新消息
        const message = new Message(contact.id, randomContent)

        // 更新消息历史
        const messages = this.messageHistory.get(contact.id) || []
        messages.push(message)
        this.messageHistory.set(contact.id, messages)

        // 更新联系人最后消息和时间
        contact.lastMessage = randomContent
        contact.lastTime = new Date()
    }
}
4.2 页面状态保存与恢复
在实际应用中,我们可能需要在页面切换时保存和恢复状态:
@Component
export struct SocialContacts {
    // 状态变量...

    // 保存状态
    saveState() {
        // 将状态保存到本地存储或全局状态管理器
        // 例如:AppStorage.SetOrCreate('socialContacts', JSON.stringify({
        //     currentChat: this.currentChat,
        //     isSideBarShow: this.isSideBarShow
        // }))
    }

    // 恢复状态
    restoreState() {
        // 从本地存储或全局状态管理器恢复状态
        // 例如:const savedState = AppStorage.Get('socialContacts')
        // if (savedState) {
        //     const state = JSON.parse(savedState)
        //     this.currentChat = state.currentChat
        //     this.isSideBarShow = state.isSideBarShow
        // }
    }
}
五、高级交互特性
5.1 下拉刷新
在社交应用中,下拉刷新是常见的交互模式,用于获取最新消息:
List() {
    Refresh({ refreshing: this.isRefreshing, offset: 120, friction: 100 }) {
        // 联系人列表...
        ForEach(this.getSortedContacts(), (item: Contact) => {
            // 列表项...
        })
    }
    .onRefreshing(() => {
        this.isRefreshing = true
        // 模拟网络请求
        setTimeout(() => {
            // 刷新联系人和消息
            this.refreshData()
            this.isRefreshing = false
        }, 1000)
    })
}

// 刷新数据
private refreshData() {
    // 模拟接收新消息
    this.simulateReceiveMessage()
    // 更新在线状态
    this.updateOnlineStatus()
}

// 更新在线状态
private updateOnlineStatus() {
    // 随机更新在线状态
    this.contacts.forEach(contact => {
        if (contact.id !== 'group') {
            this.onlineStatus.set(contact.id, Math.random() > 0.5)
        }
    })
}
5.2 长按菜单
长按联系人项可以显示更多操作选项:
ListItem() {
    ContactItem({
        contact: item,
        isActive: this.currentChat === item.id,
        isOnline: this.isContactOnline(item.id)
    })
}
.onClick(() => {
    // 点击处理...
})
.gesture(
    LongPressGesture()
        .onAction(() => {
            this.showContactMenu(item)
        })
)

// 显示联系人菜单
private showContactMenu(contact: Contact) {
    // 在实际应用中,这里可以显示一个自定义菜单
    // 例如:标记为已读、置顶、删除聊天、加入收藏等选项
    AlertDialog.show({
        title: contact.name,
        message: '选择操作',
        primaryButton: {
            value: '标记为已读',
            action: () => {
                // 标记为已读
                const index = this.contacts.findIndex(c => c.id === contact.id)
                if (index >= 0) {
                    this.contacts[index].unread = 0
                }
            }
        },
        secondaryButton: {
            value: '删除聊天',
            action: () => {
                // 删除聊天
                this.messageHistory.delete(contact.id)
                // 如果当前正在查看该聊天,切换到群聊
                if (this.currentChat === contact.id) {
                    this.currentChat = 'group'
                }
            }
        }
    })
}
5.3 拖拽排序
在某些社交应用中,用户可以通过拖拽来调整联系人顺序:
@State dragIndex: number = -1
@State dropIndex: number = -1

List() {
    ForEach(this.getSortedContacts(), (item: Contact, index: number) => {
        ListItem() {
            ContactItem({
                contact: item,
                isActive: this.currentChat === item.id,
                isOnline: this.isContactOnline(item.id)
            })
        }
        .onClick(() => {
            // 点击处理...
        })
        .gesture(
            PanGesture()
                .onActionStart(() => {
                    this.dragIndex = index
                })
                .onActionUpdate((event: GestureEvent) => {
                    // 计算当前拖拽到的位置
                    const offsetY = event.offsetY
                    const itemHeight = 60 // 假设每个列表项高度为60
                    const newDropIndex = Math.floor(offsetY / itemHeight)
                    if (newDropIndex >= 0 && newDropIndex < this.contacts.length) {
                        this.dropIndex = newDropIndex
                    }
                })
                .onActionEnd(() => {
                    // 完成拖拽,调整顺序
                    if (this.dragIndex >= 0 && this.dropIndex >= 0 && this.dragIndex !== this.dropIndex) {
                        const contacts = [...this.contacts]
                        const draggedItem = contacts[this.dragIndex]
                        contacts.splice(this.dragIndex, 1)
                        contacts.splice(this.dropIndex, 0, draggedItem)
                        this.contacts = contacts
                    }
                    this.dragIndex = -1
                    this.dropIndex = -1
                })
        )
    })
}
六、实战案例:添加群组功能
6.1 状态变量扩展
@Component
export struct SocialContacts {
    // 其他状态变量...

    // 群组列表
    @State groups: Group[] = []
    // 是否显示群组列表
    @State showGroups: boolean = false

    // ...
}

// 群组数据模型
interface Group {
    id: string
    name: string
    avatar: Resource
    members: string[]
    unread: number
    lastMessage?: string
    lastTime?: Date
}
6.2 群组功能实现
// 侧边栏顶部添加切换按钮
Row() {
    Button('联系人')
        .backgroundColor(this.showGroups ? '#f5f5f5' : '#007aff')
        .fontColor(this.showGroups ? '#000000' : '#ffffff')
        .onClick(() => {
            this.showGroups = false
        })
    Button('群组')
        .backgroundColor(this.showGroups ? '#007aff' : '#f5f5f5')
        .fontColor(this.showGroups ? '#ffffff' : '#000000')
        .onClick(() => {
            this.showGroups = true
        })
}
.width('100%')
.padding(10)

// 根据当前模式显示不同列表
if (this.showGroups) {
    // 显示群组列表
    List() {
        ForEach(this.groups, (group: Group) => {
            ListItem() {
                GroupItem({
                    group: group,
                    isActive: this.currentChat === group.id
                })
            }
            .onClick(() => {
                this.currentChat = group.id
                // 清除未读
                const index = this.groups.findIndex(g => g.id === group.id)
                if (index >= 0 && this.groups[index].unread > 0) {
                    this.groups[index].unread = 0
                }
            })
        })
    }
} else {
    // 显示联系人列表
    // ...
}

// 群组项组件
@Component
struct GroupItem {
    @Prop group: Group
    @Prop isActive: boolean

    build() {
        Row() {
            // 群组头像
            Stack() {
                Image(this.group.avatar)
                    .width(40)
                    .height(40)
                    .borderRadius(20)

                if (this.group.unread > 0) {
                    Text(this.group.unread.toString())
                        .width(20)
                        .height(20)
                        .borderRadius(10)
                        .backgroundColor('#ff0000')
                        .fontColor(Color.White)
                        .textAlign(TextAlign.Center)
                        .position({ x: '80%', y: '0%' })
                }
            }
            .margin(10)

            // 群组信息
            Column() {
                Row() {
                    Text(this.group.name)
                        .fontSize(16)
                        .fontColor(this.isActive ? '#007aff' : '#000000')
                        .layoutWeight(1)

                    if (this.group.lastTime) {
                        Text(this.formatTime(this.group.lastTime))
                            .fontSize(12)
                            .fontColor('#9E9E9E')
                    }
                }
                .width('100%')

                if (this.group.lastMessage) {
                    Text(this.group.lastMessage)
                        .fontSize(14)
                        .fontColor('#666666')
                        .maxLines(1)
                        .textOverflow({ overflow: TextOverflow.Ellipsis })
                }

                Text(`${this.group.members.length}人`)
                    .fontSize(12)
                    .fontColor('#9E9E9E')
            }
            .layoutWeight(1)
        }
        .width('100%')
        .backgroundColor(this.isActive ? '#f5f5f5' : '#ffffff')
        .padding({ top: 5, bottom: 5 })
    }

    // 格式化时间
    private formatTime(date: Date): string {
        // 实现同ContactItem...
    }
}
七、总结
本教程深入探讨了如何为社交应用添加交互功能和状态管理 通过这些功能的实现,我们的社交应用变得更加交互式和用户友好。SideBarContainer组件与状态管理的结合,为用户提供了流畅的导航体验和丰富的功能。 在实际开发中,可以根据具体需求进一步扩展这些功能,例如添加语音消息、视频通话、文件传输等。HarmonyOS NEXT提供的丰富组件和状态管理机制,为开发高质量的社交应用提供了强大支持。
